Get Started Guide on Linux
Get Started Guide on Linux
This guide will help you configure your first backup job on Linux in about 10 minutes.
Important: This guide covers the new SqlBak Preview interface. If you’re using the classic SqlBak interface, some screens and settings may look different.
Step 1. Create a SqlBak account
Sign up at app.sqlbak.com.
After registration, you will be automatically redirected to the Dashboard.
Step 2. Download and install SqlBak Agent
In the SqlBak Dashboard, click Add Server in the upper-right corner.

You will be redirected to the Download page:
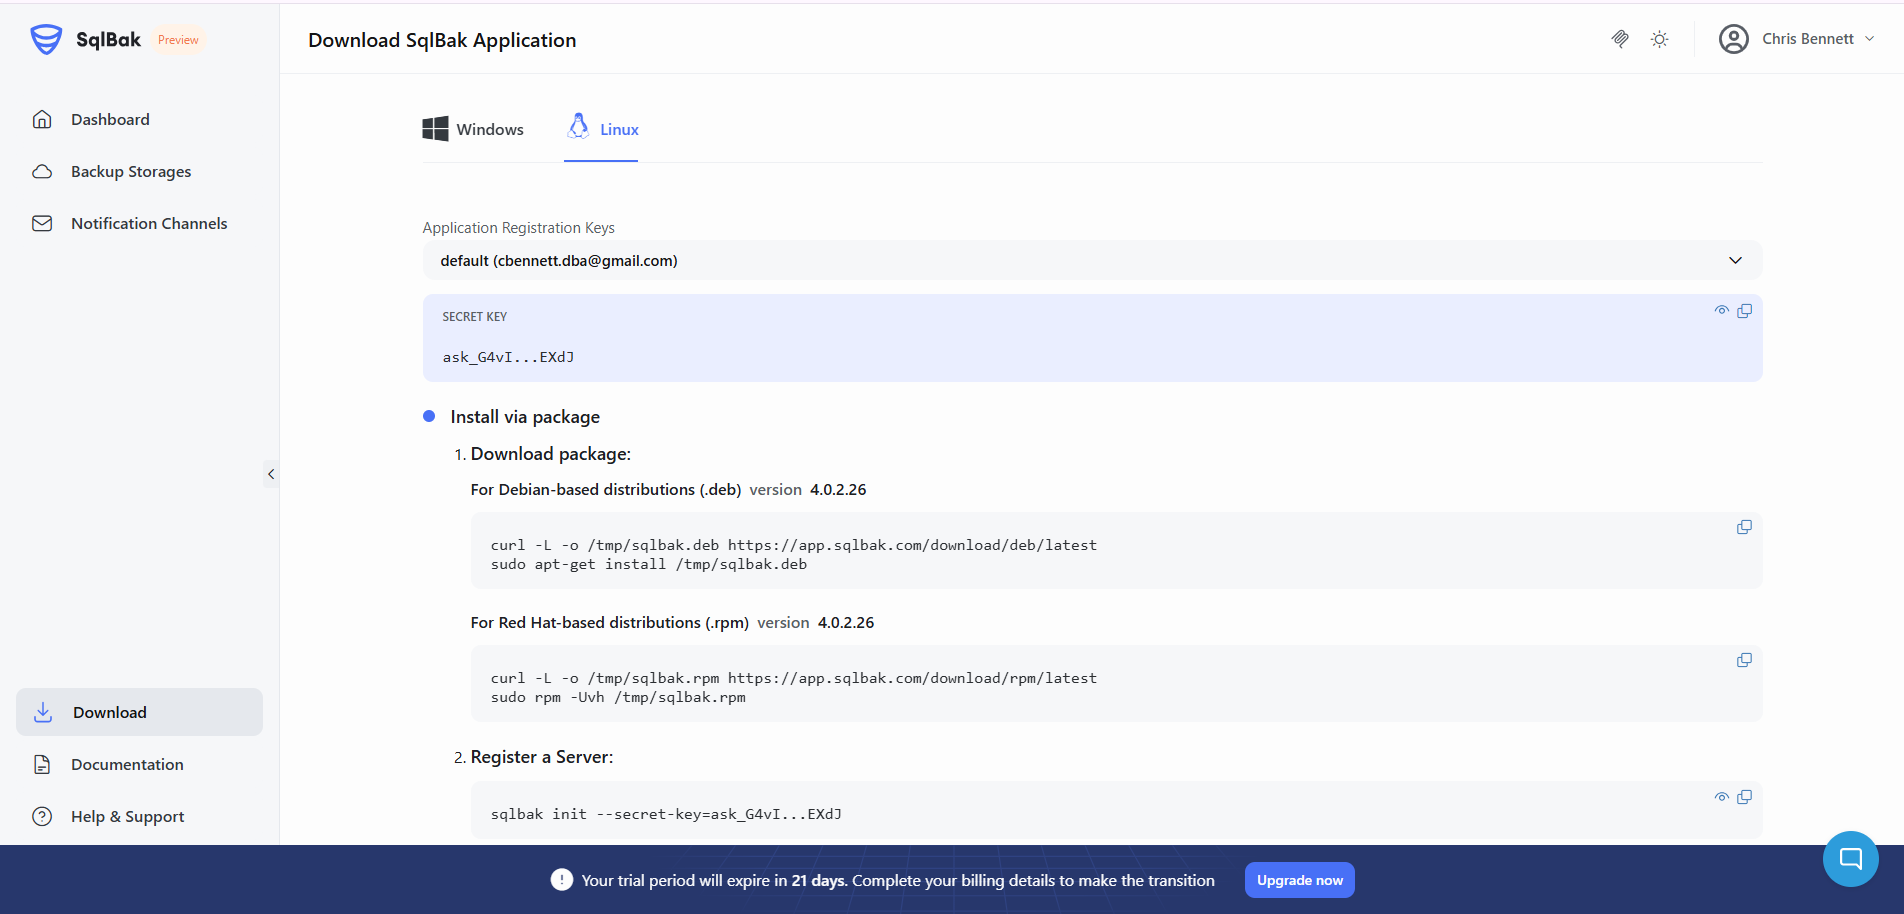
Install via package
Download and install package:
curl -L -o /tmp/sqlbak.deb https://app.sqlbak.com/download/deb/latest sudo apt-get install /tmp/sqlbak.deb
curl -L -o /tmp/sqlbak.rpm https://app.sqlbak.com/download/rpm/latest sudo rpm -Uvh /tmp/sqlbak.rpm
Install via Docker
Run SqlBak Container:
docker run -d --name sqlbak_agent -v sqlbak_data:/etc/sqlbak.net --restart unless-stopped pranasnet/sqlbak-agent:mysql
Available tags: mysql, postgresql, mssql
Details of using SqlBak Docker container when creating physical backups or together with the Docker compose tool are available on our page at Docker Hub.
Step 3. Connect the server to Dashboard
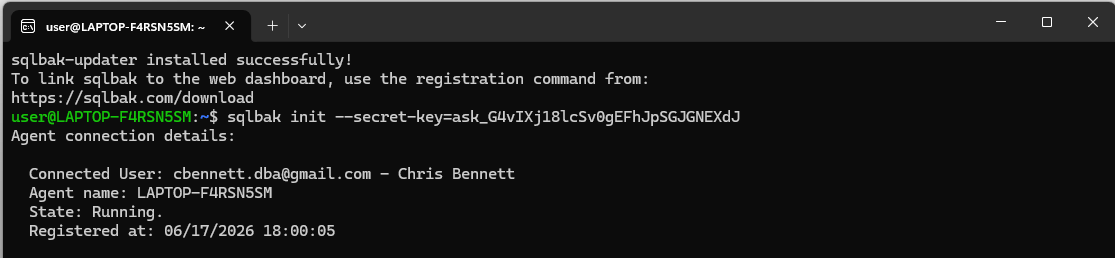
After installation, register the server in Sqlbak Dashboard:
For Linux
sqlbak init --secret-key=ask_G4vI...EXdJ
For Docker
docker exec -i sqlbak_agent sqlbak agent connect --secret-key=ask_G4vI...EXdJ --server-name=<name_on_dashboard>
Copy your Secret Key from one of the following locations:
• Download page
• app.sqlbak.com/account/keys
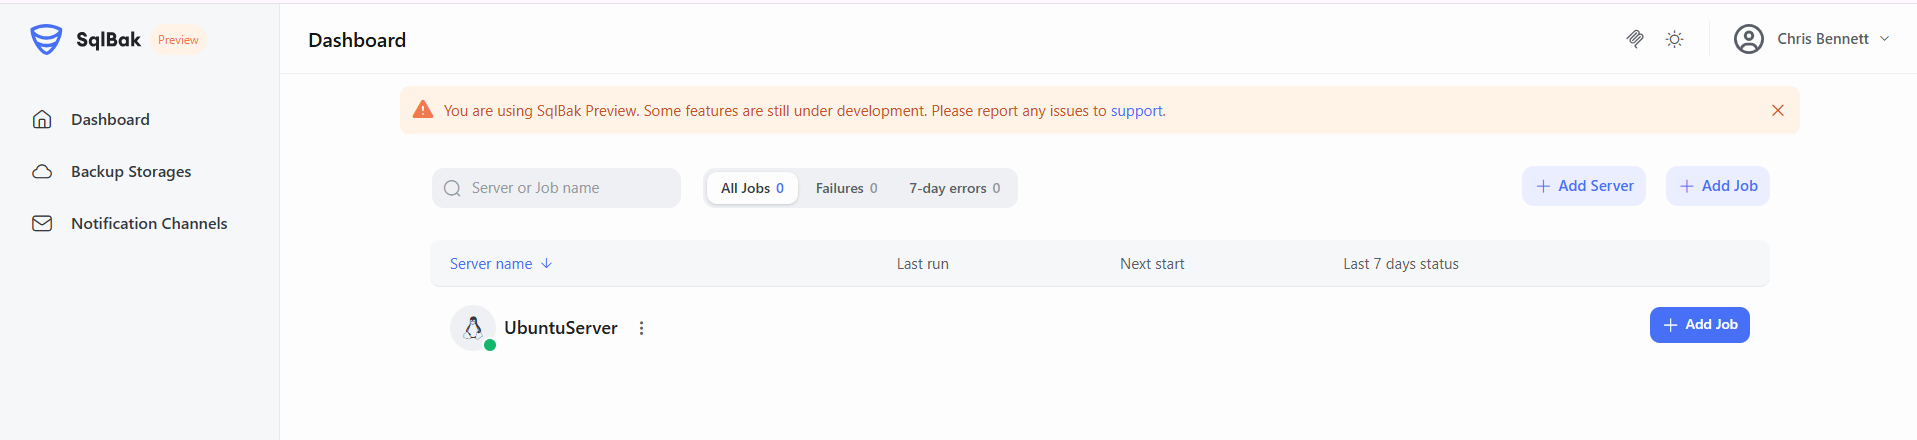
Expected result:
The server appears online in the SqlBak Dashboard:
Step 4. Add a database connection
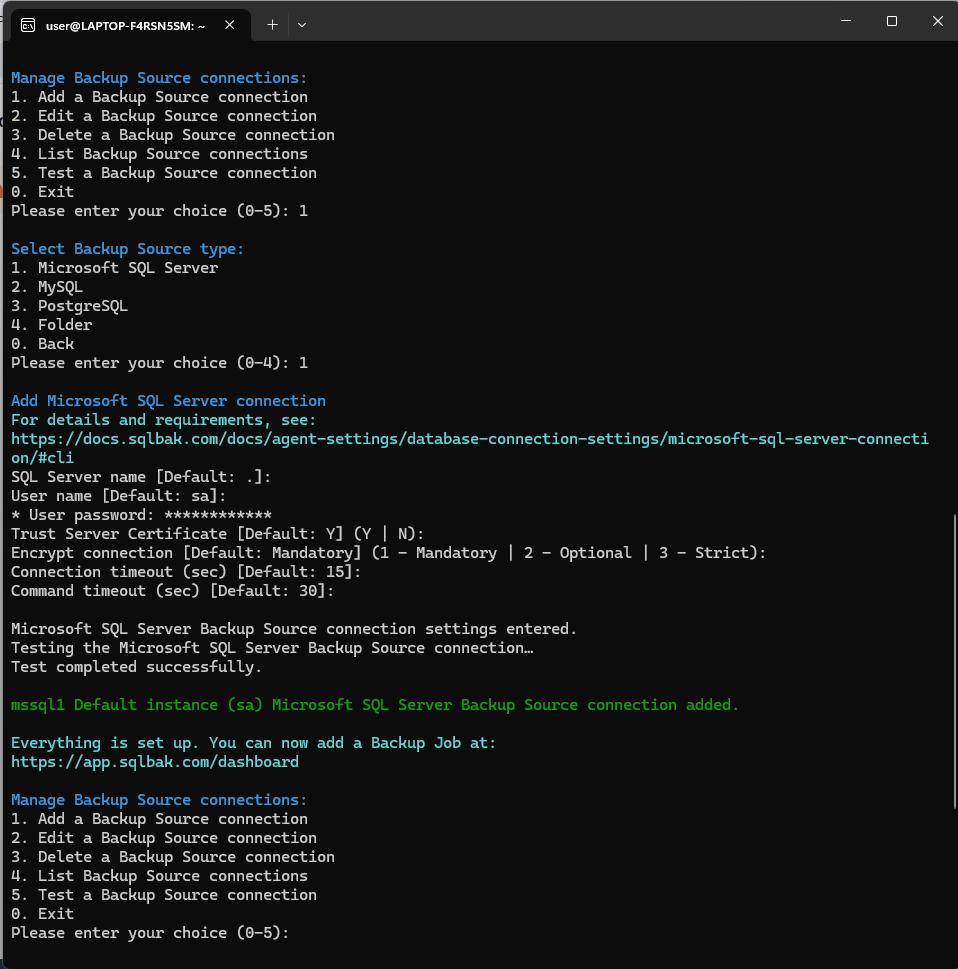
Run sudo sqlbak, select Add a Backup Source connection, and choose the appropriate source type (Microsoft SQL Server, MySQL, PostgreSQL, or Folder).
Step 5. Create a backup job
Open the SqlBak Dashboard: https://app.sqlbak.com/dashboard
Click Add Job and select the server where the database connection was configured.
Choose Backup Job.
 Add backup job
Under What to back up? section select the databases you want to protect:
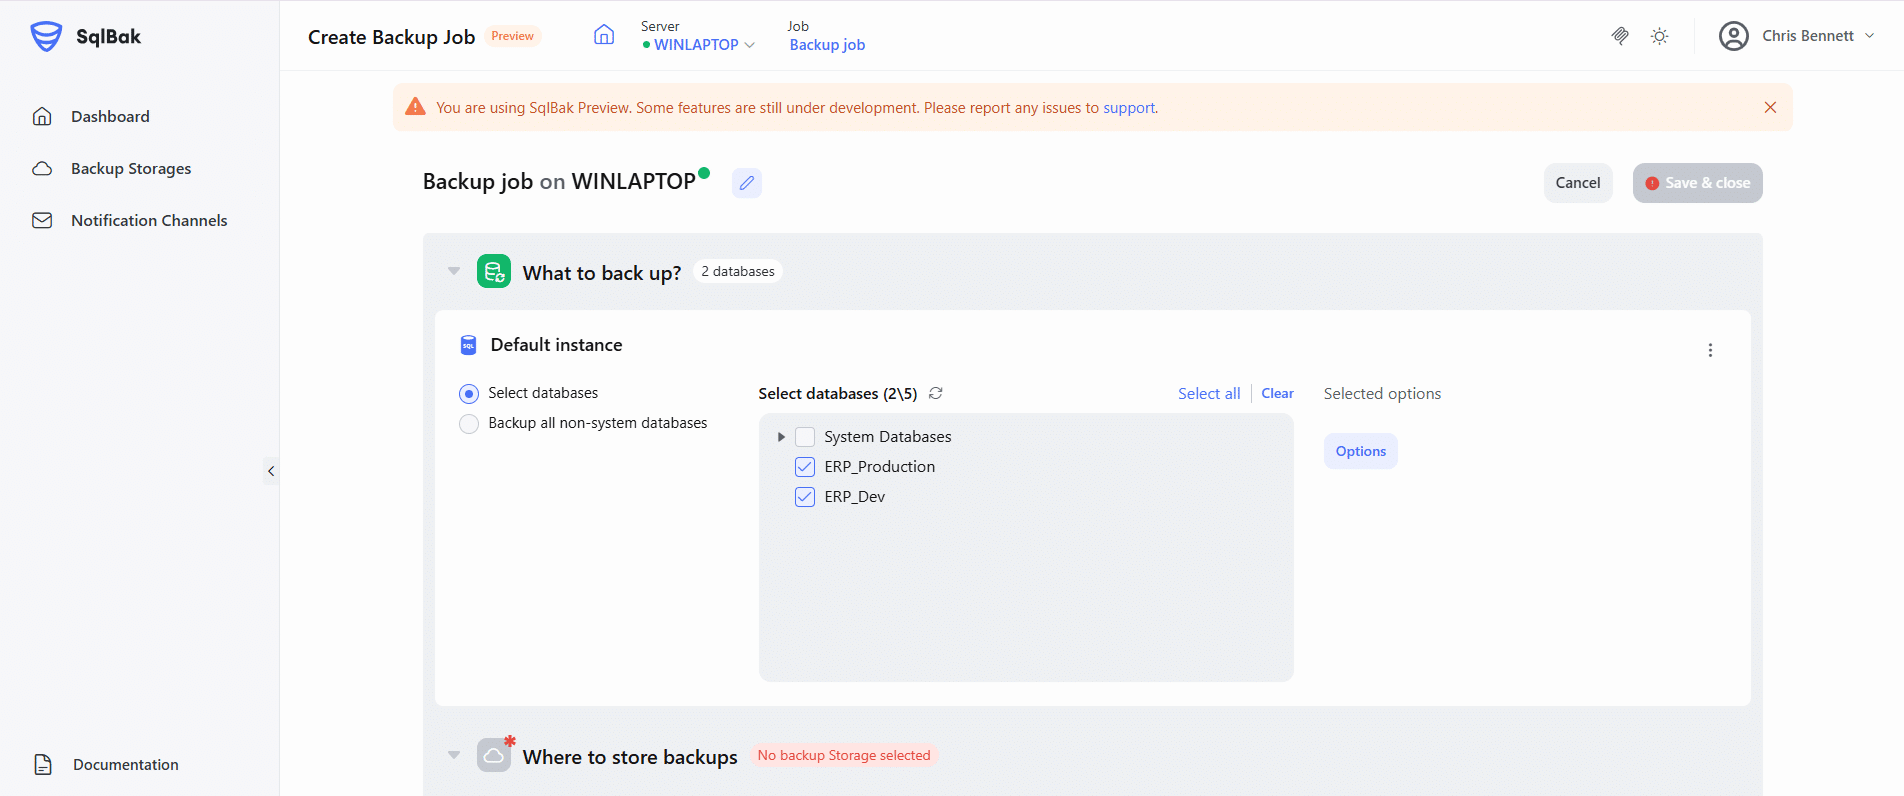
If needed, click Options to configure advanced SQL Server backup settings.
Step 6. Select a backup destination
Click Add backup Storage in Where to store backups section:
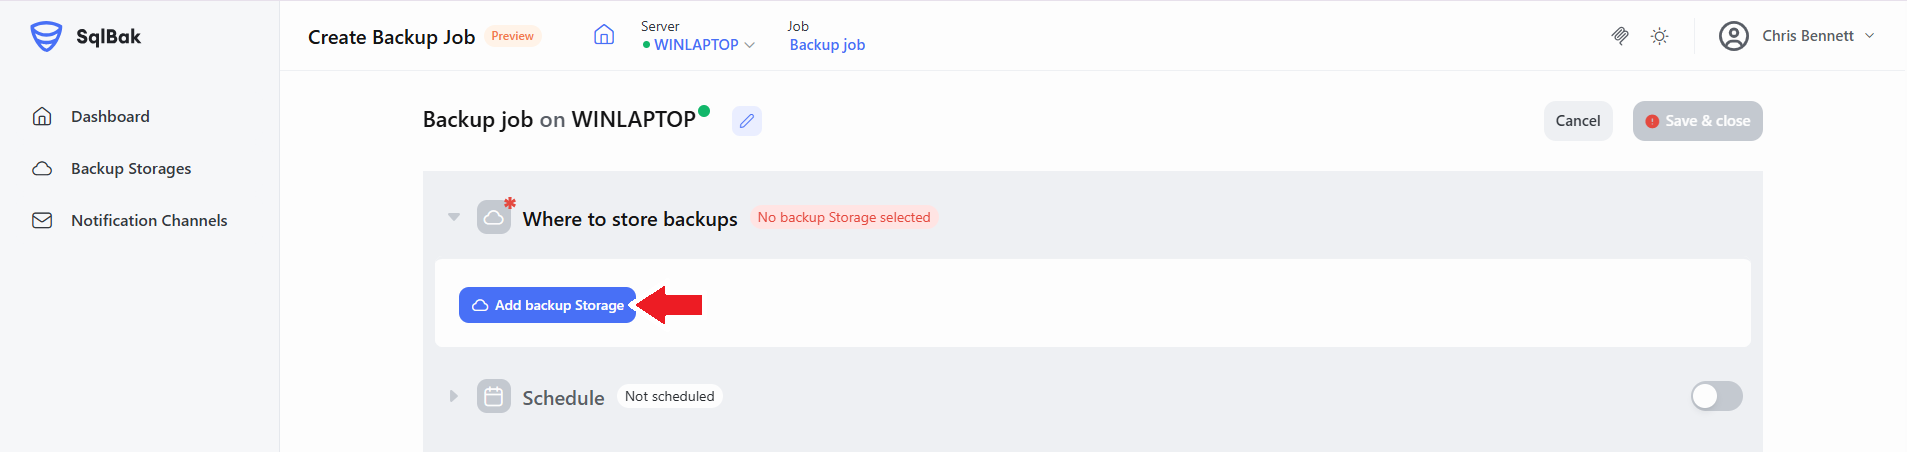
Click Add new Storage and select a backup destination:

Enter the required storage credentials.
For example, when configuring Amazon S3, specify:
- Access Key ID
- Secret Access Key
- Bucket Name
- Authentication Region
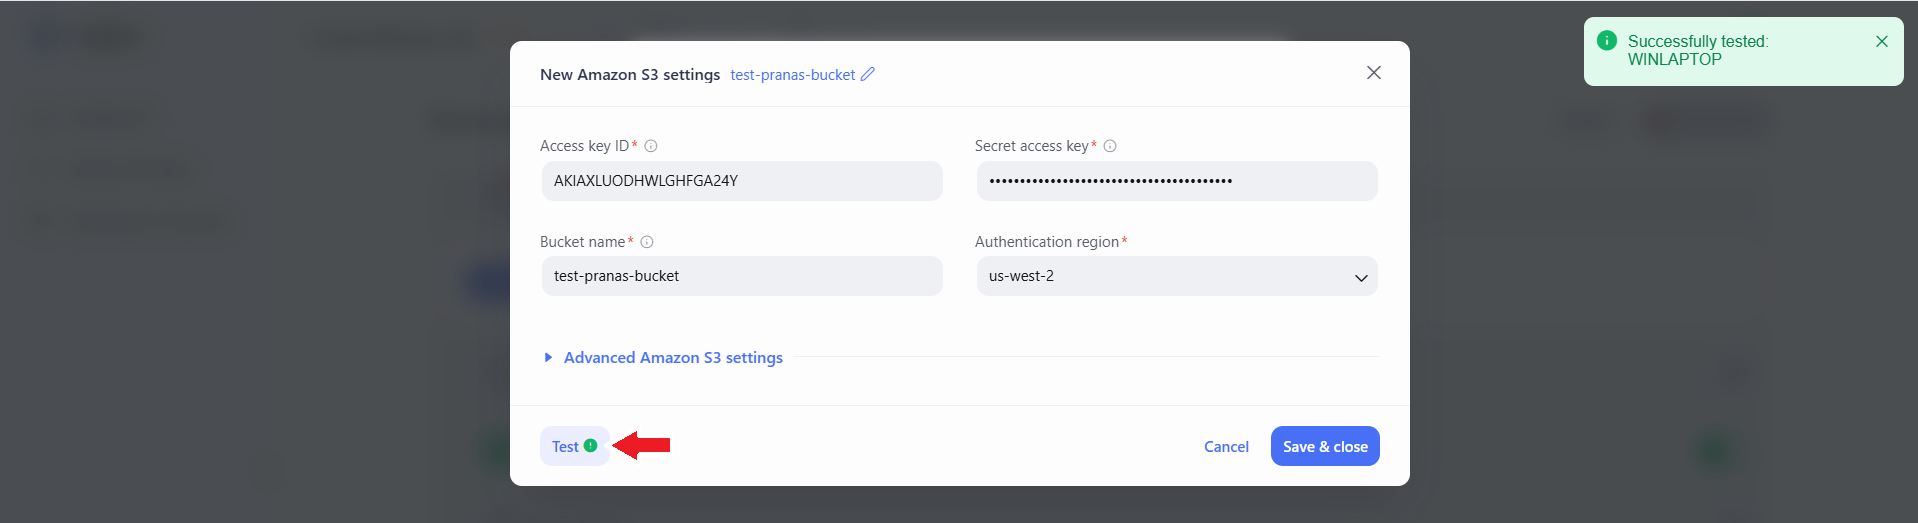
Click Test to verify the connection. After the test succeeds, click Save & Close.
Step 7. Configure schedule
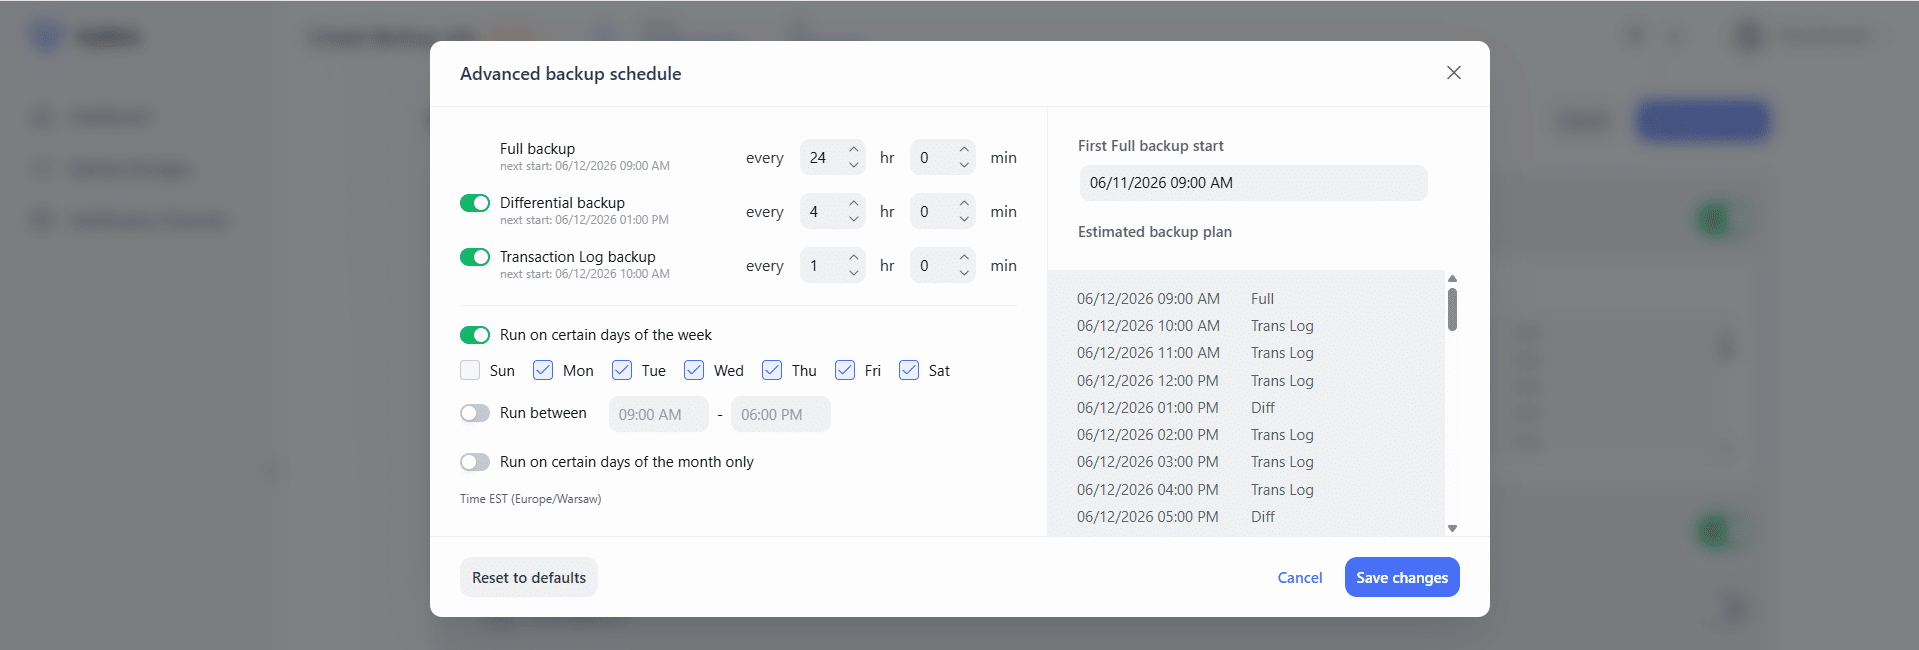
In the Schedule section, enable scheduling using the toggle switch on the right. After scheduling is enabled, configure when backups should run.
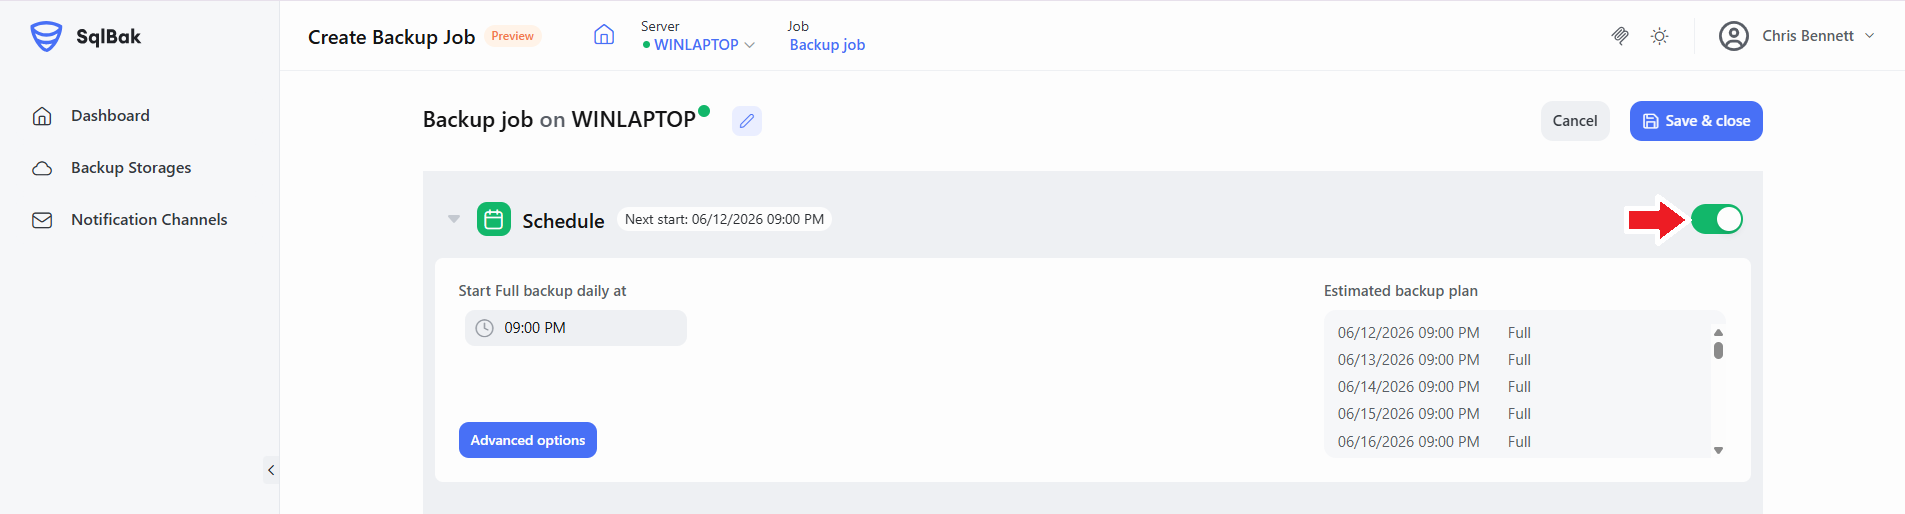
After enabling the schedule, specify when the backup should run.
For a simple daily backup plan, select the desired start time and leave the default schedule settings unchanged.
To configure Differential and Transaction Log backups, click Advanced options.
Step 8. Configure Notifications (Optional)
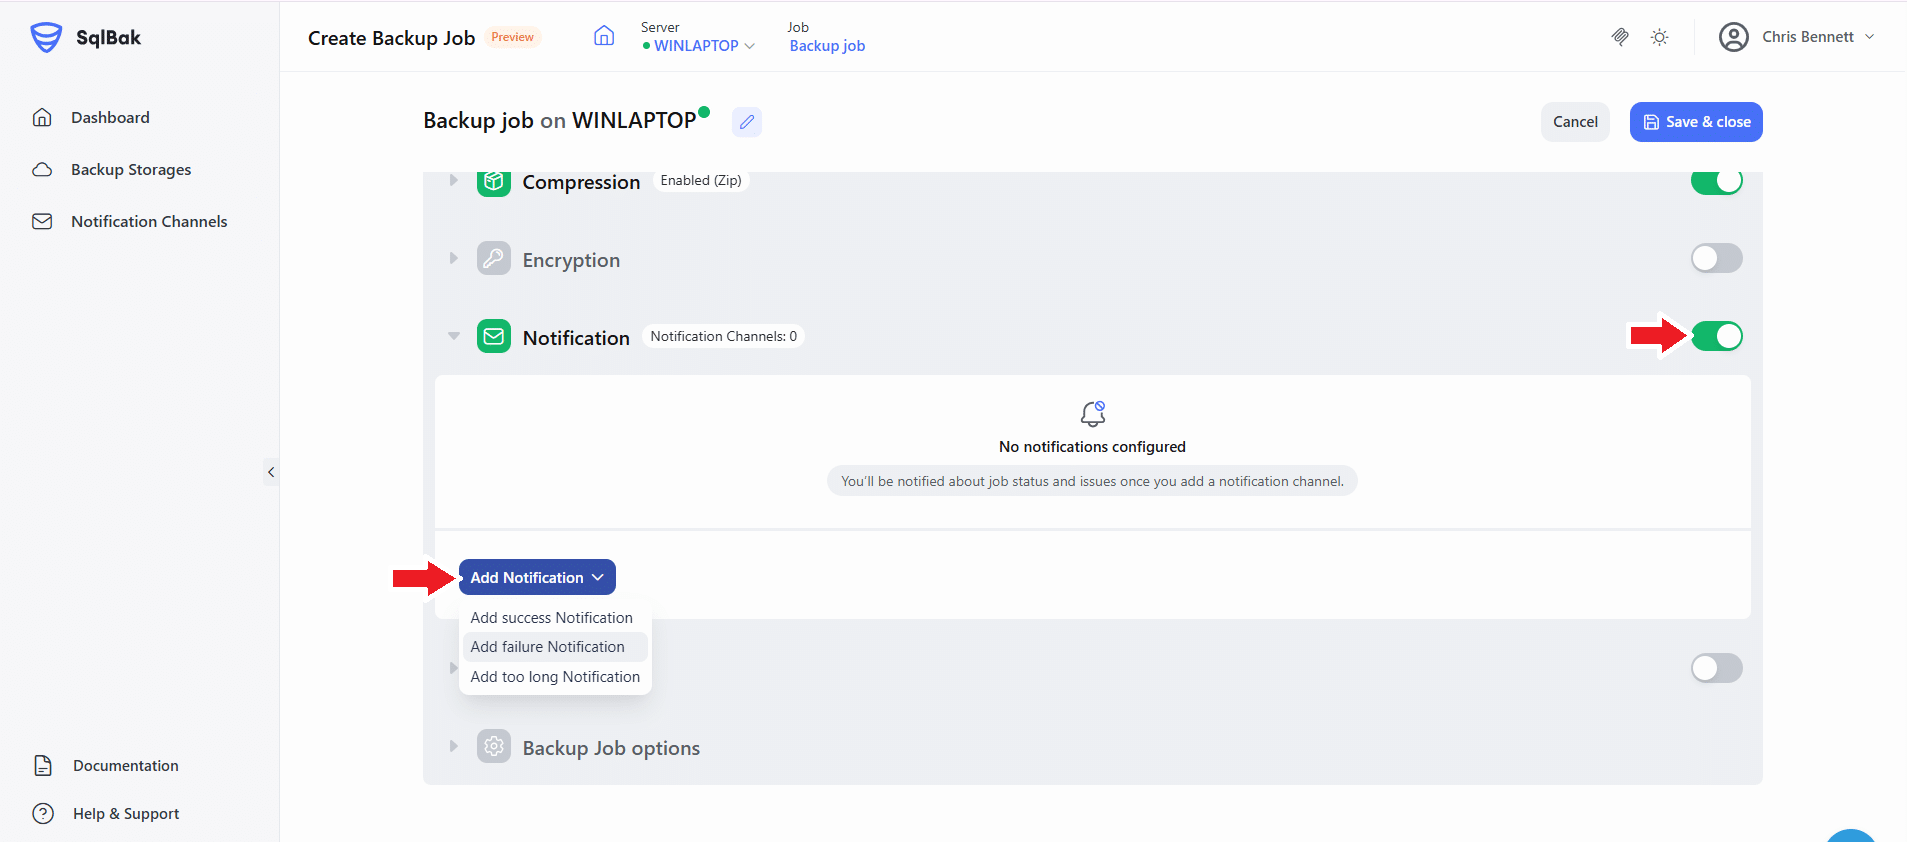
1) Expand the Notification section and enable notifications using the toggle switch.
2) Click Add Notification and choose when to receive notifications:
- Success – when a backup job completes successfully.
- Failure – when a backup job fails.
- Too long – when a backup job takes longer than expected.
3) Select a notification channel.
Click Add new channel and create an Email or Slack notification channel.
For Slack notifications, obtain a Webhook URL by following the Slack notification setup guide.
After configuring the channel, click Test, then Save & Close.
Select the channel to associate it with the notification rule.
Important: when you’re finished configuring the backup job, click Save & Close in the upper-right corner.
The backup job is created and appears in the Dashboard.
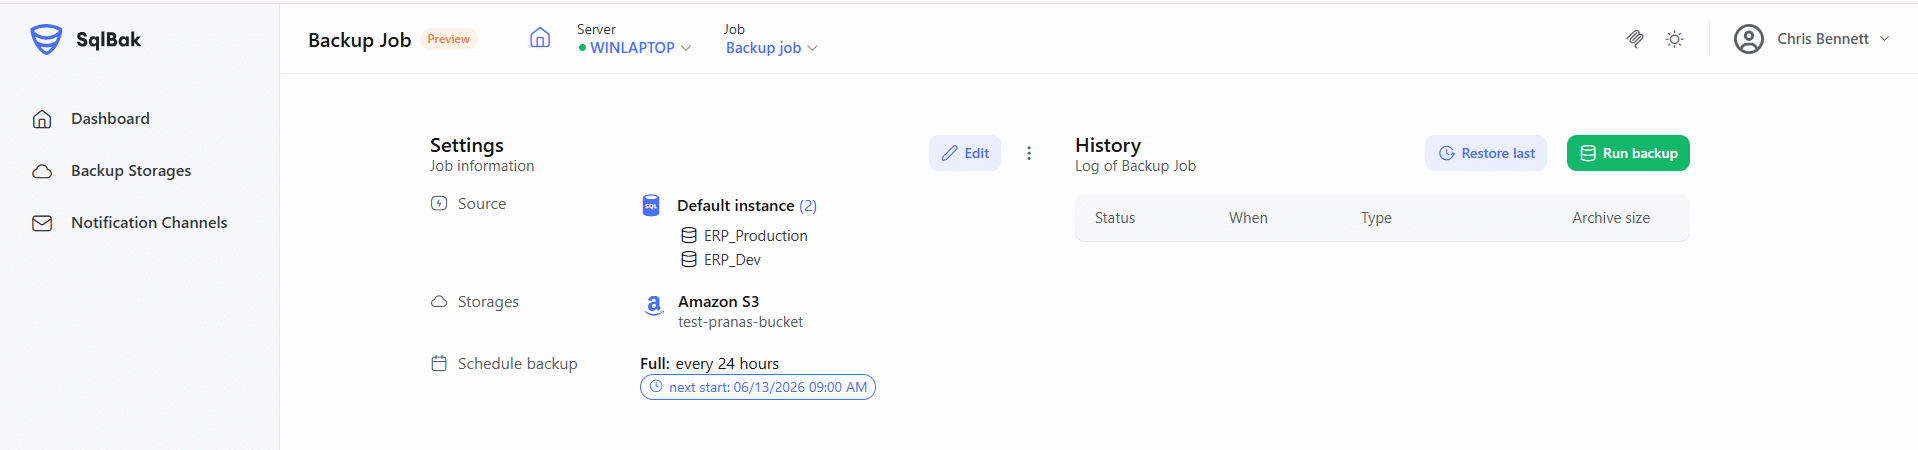
If scheduling is enabled, the backup job will run automatically according to the configured schedule.
Step 9. Run the first backup
Click Run Now.
Monitor progress in Job History.
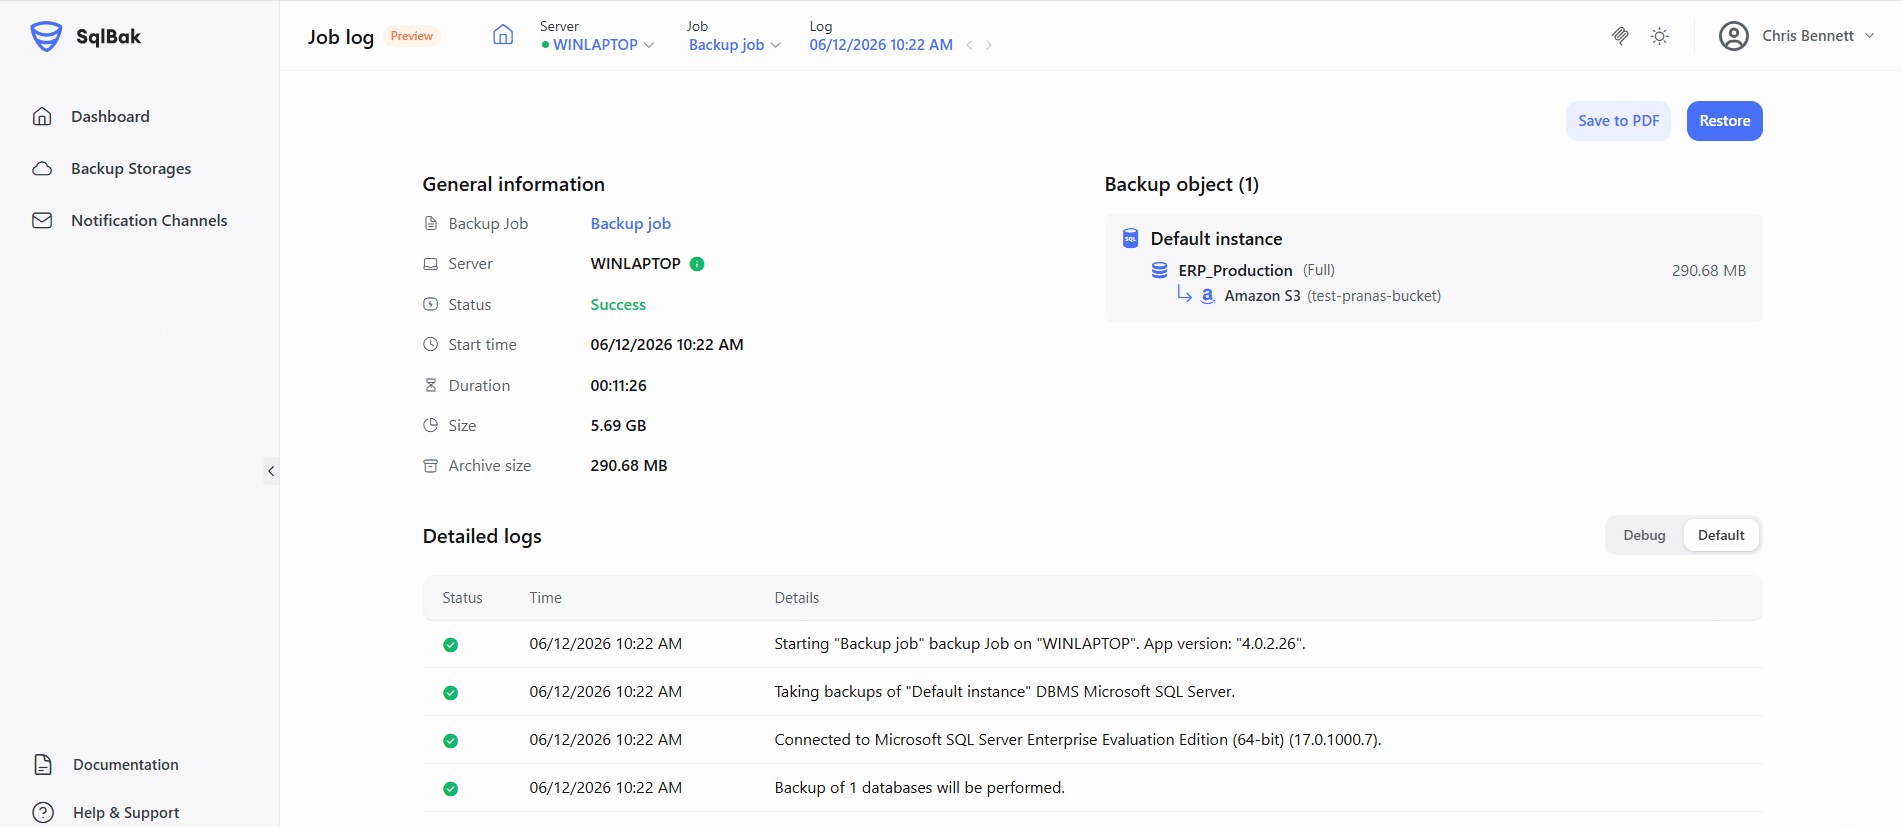
The first backup completes successfully. Future backups will run automatically according to the schedule.
Step 10. Verify restore
To verify that your backups can be restored successfully, perform a test restore.
Open the backup job log and click Restore in the upper-right corner.
Select:
- The database to restore.
- The backup storage containing the backup.
- The restore destination.
Review the restore settings and click Confirm Restore.
Important: If a database with the same name already exists on the target SQL Server, it will be overwritten.
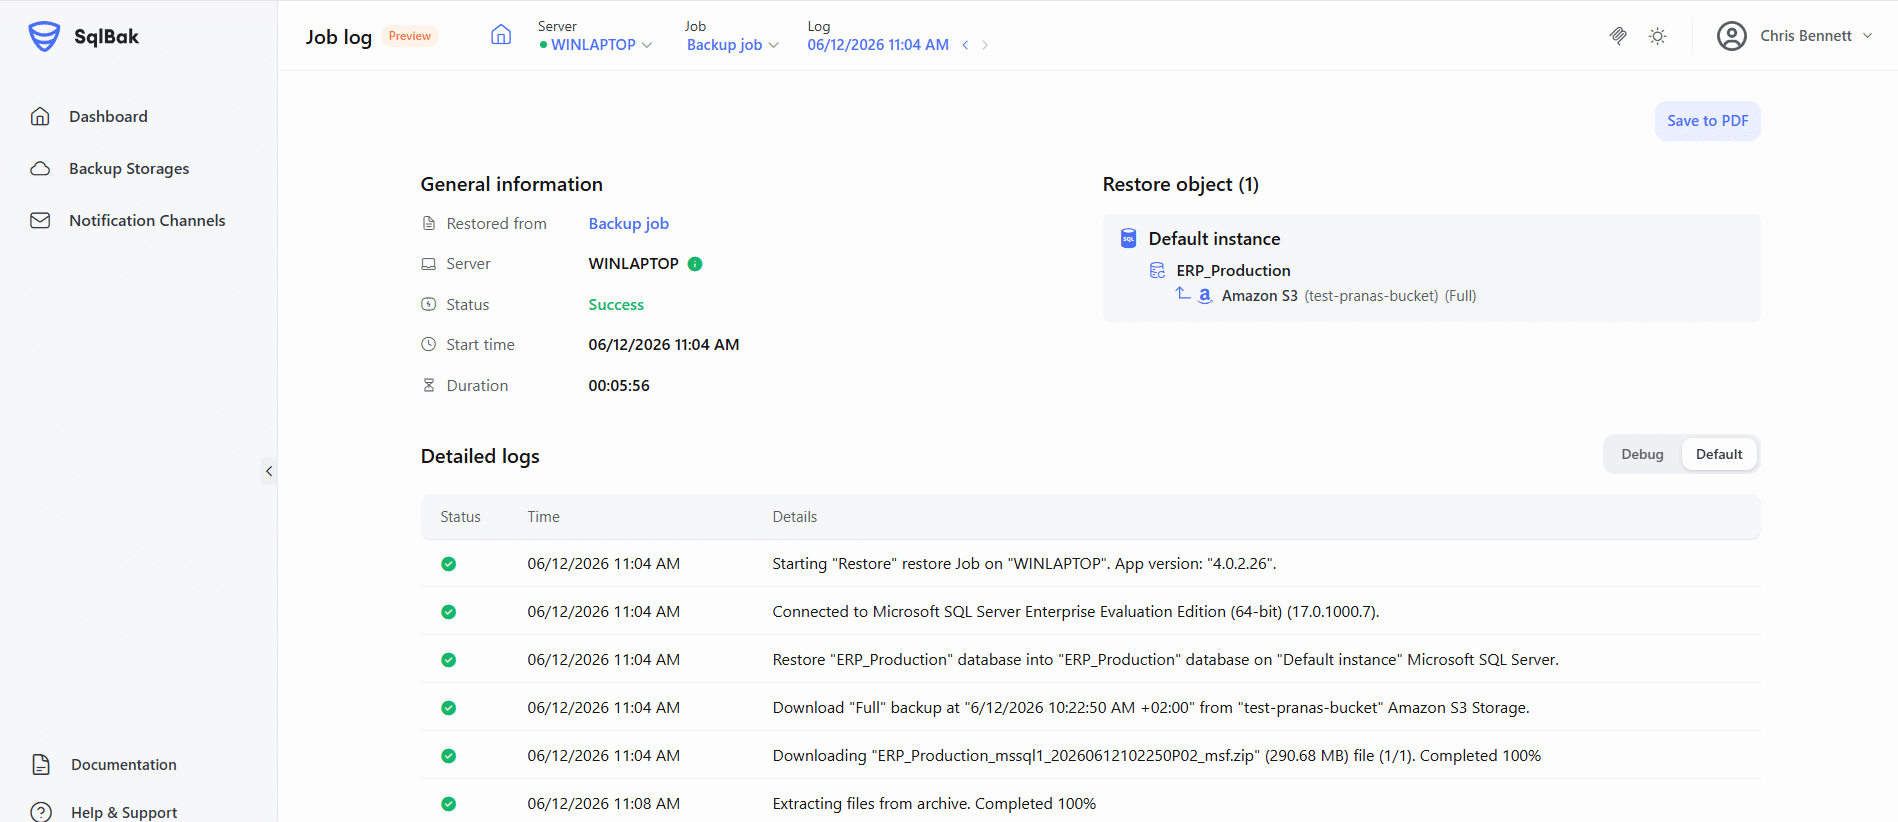
The database is restored successfully and is available on the destination server.
Congratulations! Your first backup job is now configured and your restore procedure has been verified.