Azure Blob
Adding Azure Blob storage as a backup destination
To send backups to Azure Blob storage, you first need to set up a destination in the “Storages” page:
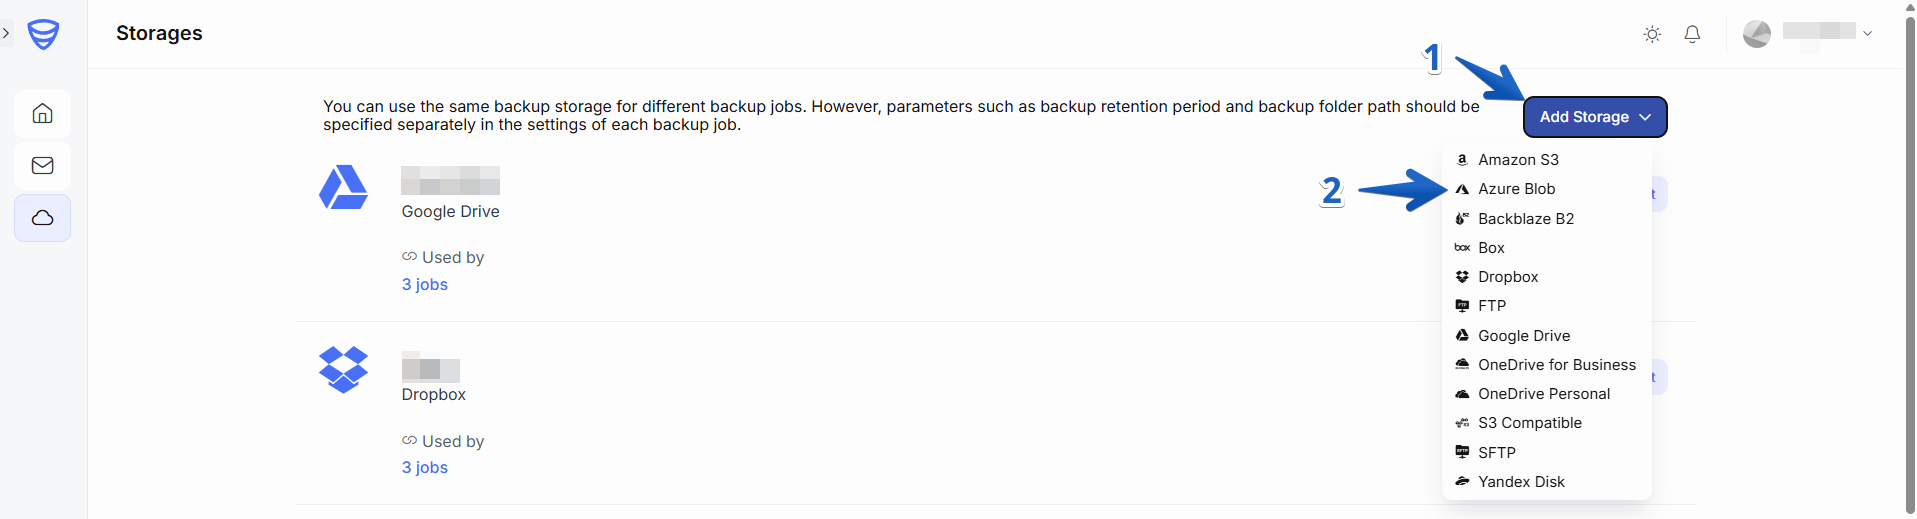
1. Go to the “Storages” page and click “Add Storage” and select Azure Blob as the storage destination:
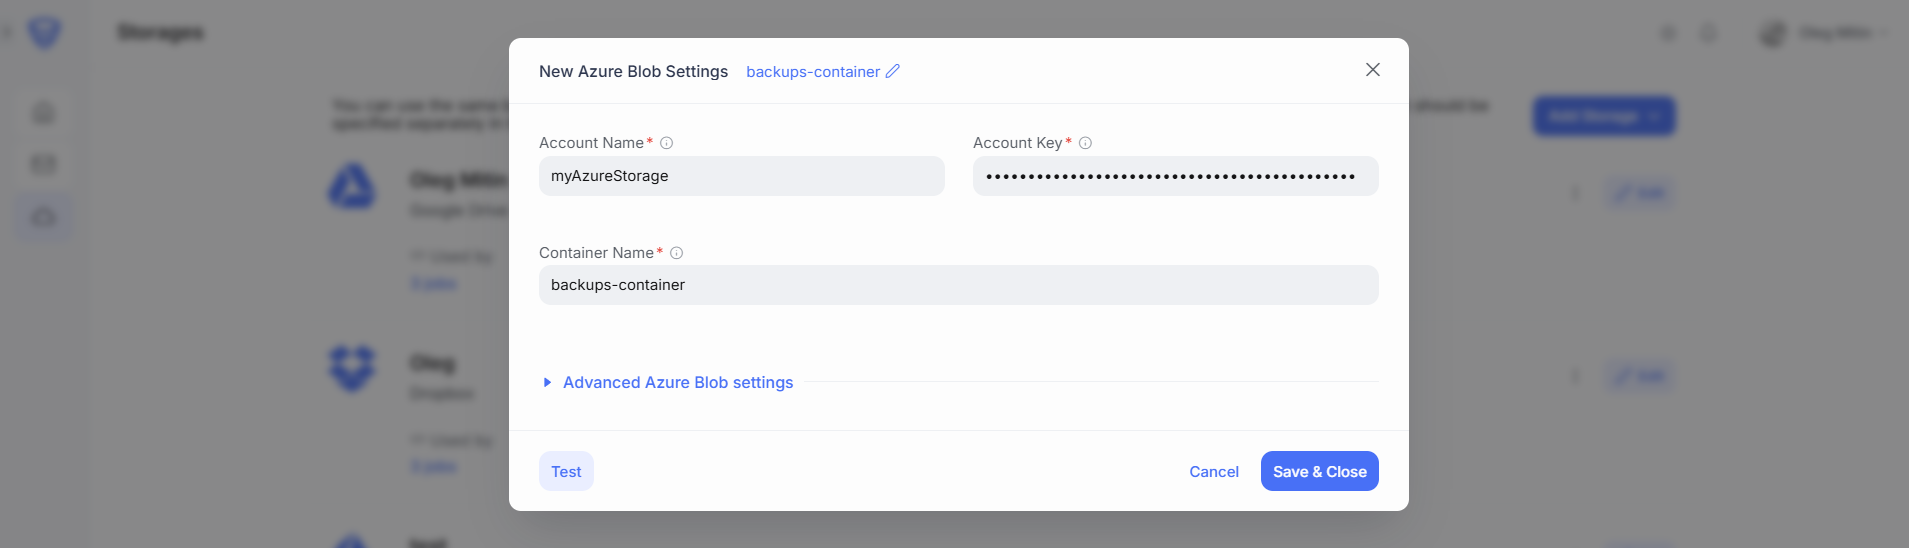
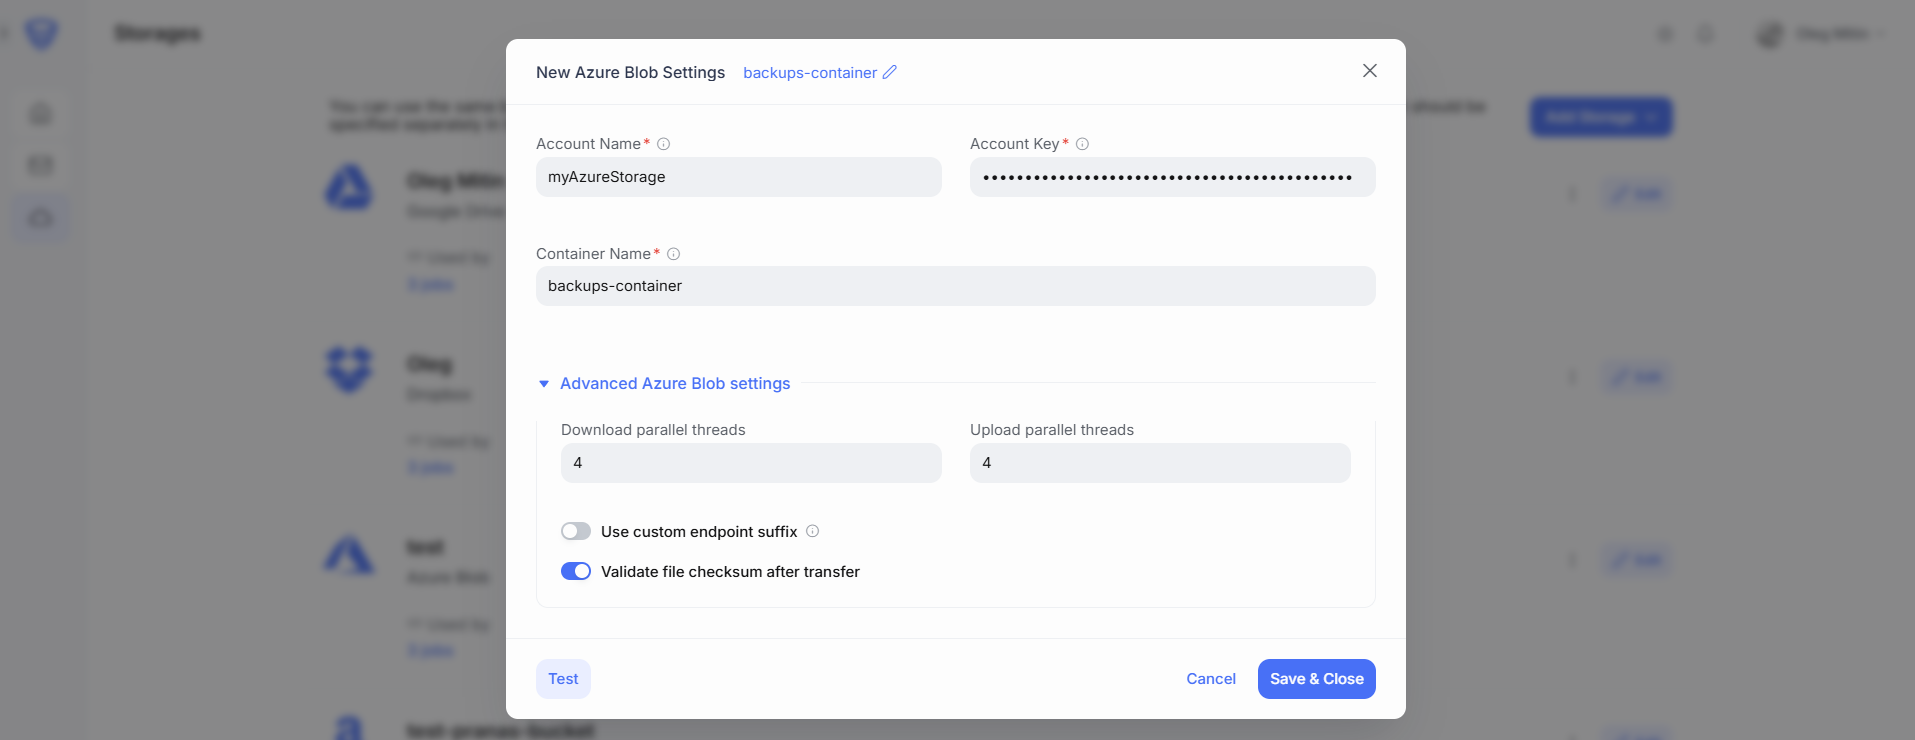
2. In the “New Azure Blob Settings” pop-up window, enter the following credentials:
-
-
Account Name – Account name can be found on Windows Azure portal.
-
Account Key – You can find account key on Windows Azure portal in the Access keys section.
-
Container Name – This is the container where your backups will be stored. You need to create this container in your Azure portal before configuring it in the app.
-
Once configured, click “Test” to verify the connection. If successful, click “Save & Close” to apply your settings.
These are the basic settings required to configure Amazon S3 as a backup destination.
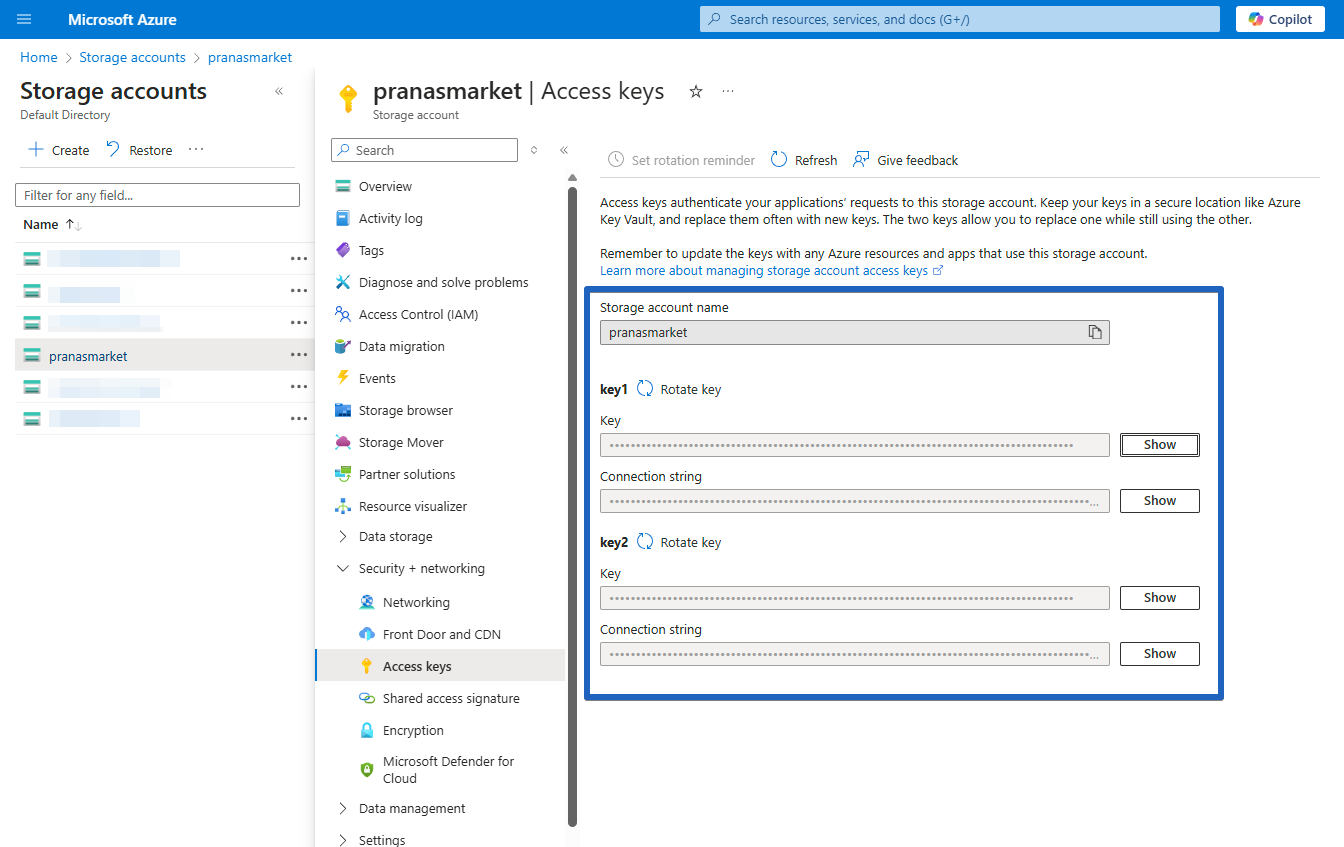
How to find Account Key in Azure Portal
-
Click on “All services” from the left-hand menu or the top shortcut area.
-
In the search bar, type “Storage accounts”, then click on the Storage accounts result.
-
From the list of storage accounts, select the one you want to use.
-
In the left-hand menu of the selected storage account, scroll down to the “Security + networking” section.
-
Click on “Access keys”. You will now see available Keys along with their connection strings.
Advanced Azure Blob Settings (Optional)
You can further customize your backup storage with the following options:
-
Parallel Upload/Download Threads – This setting controls how many simultaneous threads SqlBak uses for uploading or downloading backups to/from storage. Increasing the number of threads can speed up the transfer, especially over high-bandwidth connections.
⚠️Note: more threads also increase the load on your network, CPU, and disk. Use this option to optimize performance based on your system’s capabilities. In some cases, you may also reduce the number of threads to limit resource usage or avoid saturating the network.
-
Use custom endpoint suffix – Required for connecting to Azure environments with different endpoint suffixes, such as Azure Government or Azure China 21Vianet.
-
Validate file checksum after transfer – Ensures data integrity after transfer by verifying that the uploaded file matches the original. More details here: 🔗 Validate File Checksum
Once configured, click “Test” to verify the connection. If successful, click “Save & Close” to apply your settings.
Steps to add Azure Blob storage to a backup job:
-
Return to the Dashboard page.
-
Open the backup job you want to modify (or create a new one), and click the “Edit” button.
-
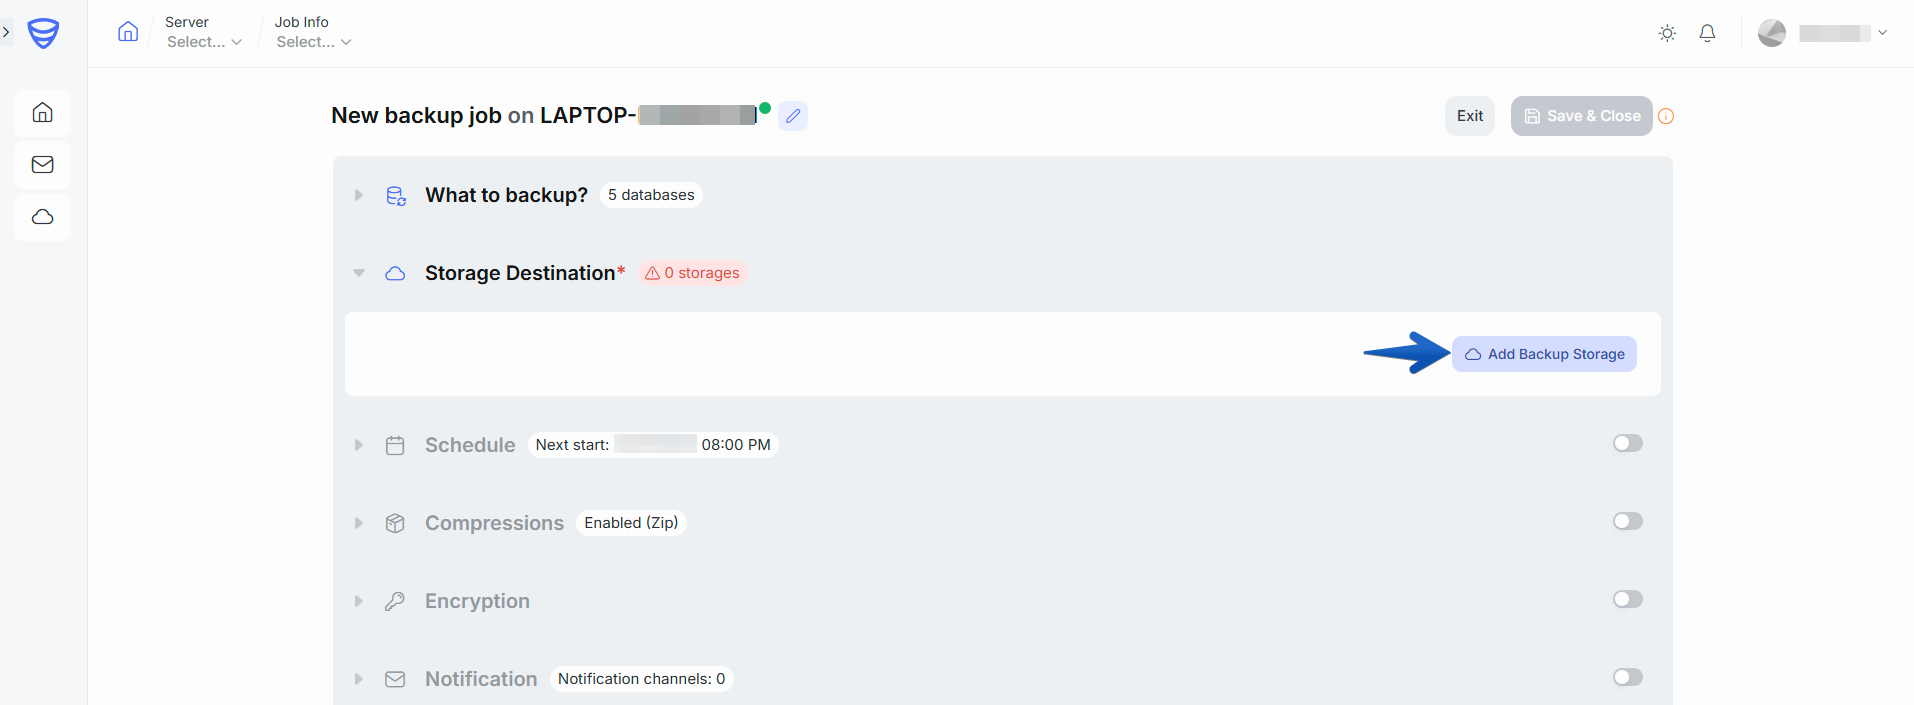
Navigate to the Storage Destination section.
-
Click “Add Backup Storage”.
5. Select Azure Blob Storage as the destination.

6. In the configuration window, specify the following:
-
-
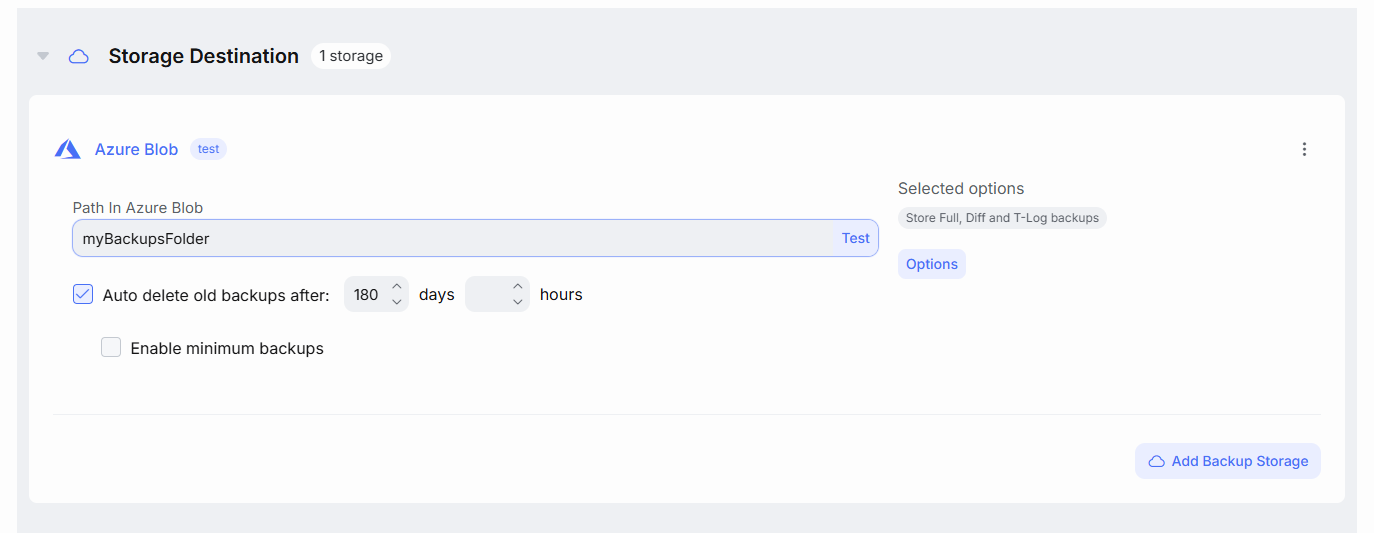
Autodelete old backups after – Define a retention period for automatically deleting old backups.
-
Enable minimum backups – Set the minimum number of backups to retain, even if they exceed the defined retention period.
-
Optional settings:
-
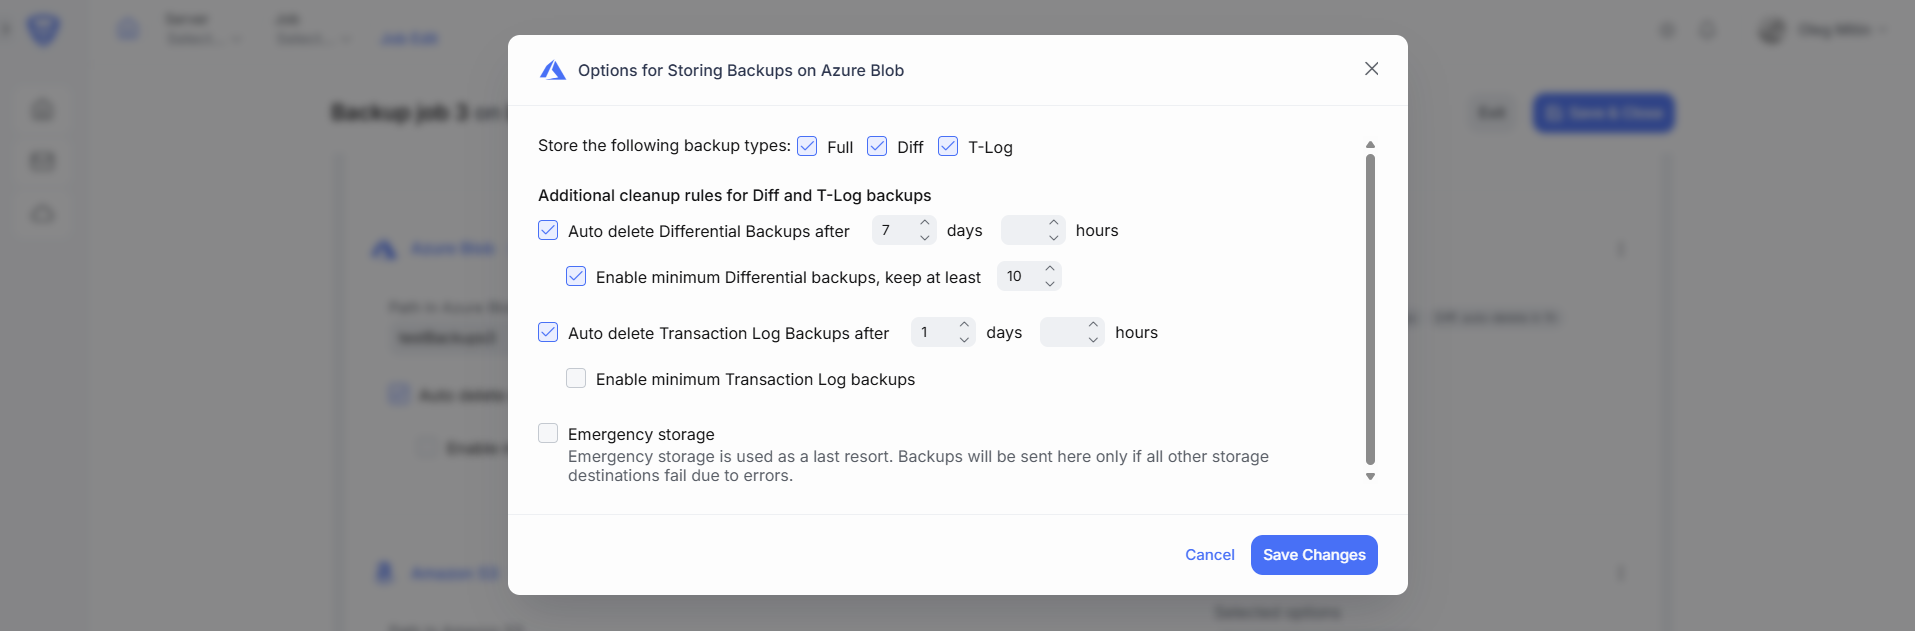
Store the following backup types (Full, Diff, T-Log) – Choose which backup types to store in this destination.
-
Auto delete Differential Backups after – Define a retention period specifically for differential backups.
-
Auto delete T-Log Backups after – Define a retention period specifically for transaction log backups.
-
Enable minimum Differential or T-Log backups – Set the minimum number of differential or T-Log backups to keep, even if older than the retention limit.
-
Emergency storage – Use this option to designate Azure Blob as an emergency/failover destination in case the primary backup storage becomes unavailable. More details here: 🔗 Use Emergency Storage