S3 Compartible
Adding S3 Compartible storage as a backup destination
To send backups to S3 Compartible storage, you first need to set up a destination in the “Storages” page:
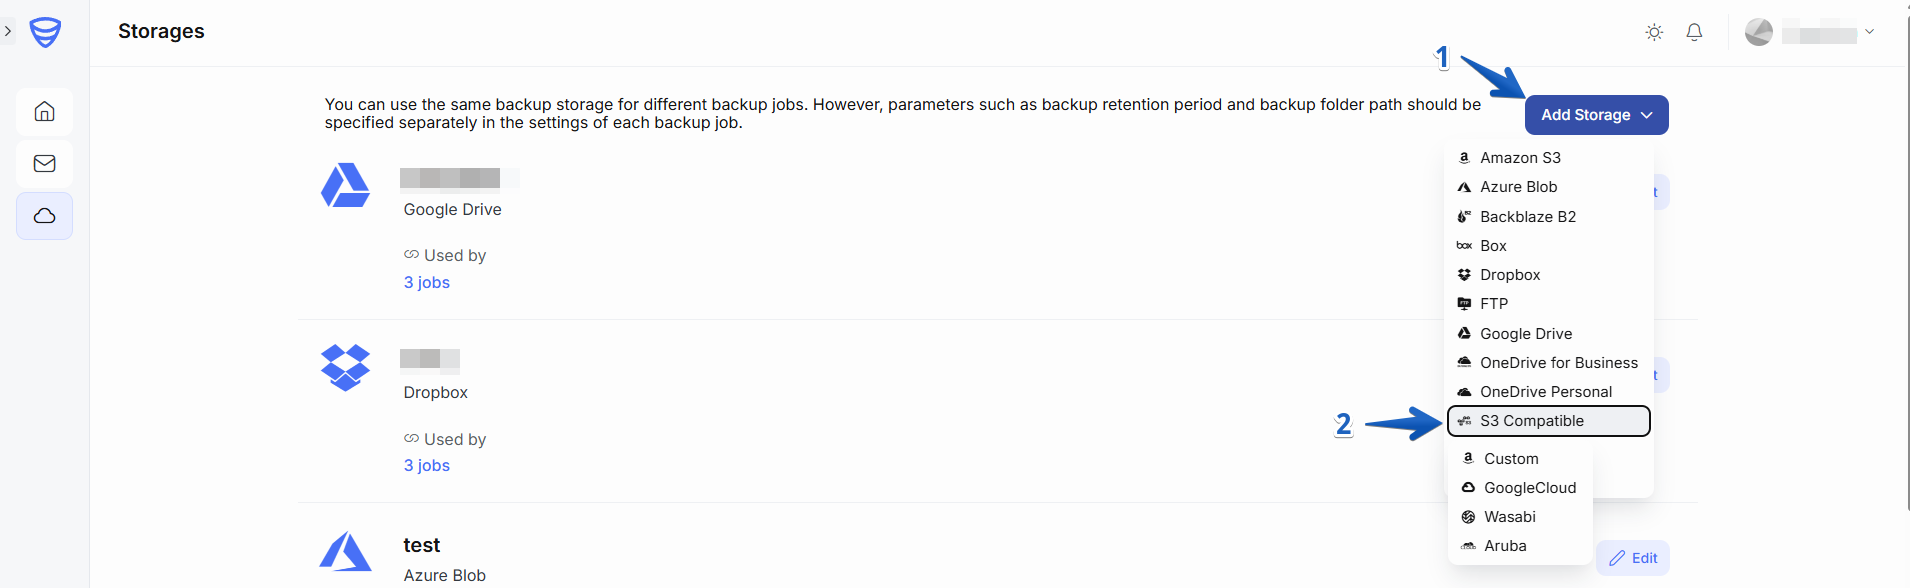
1. Go to the “Storages” page and click “Add Storage” and select S3 Compartible as the storage destination. From the dropdown list, choose your S3-compatible provider. If your provider is not listed, select “Custom”.
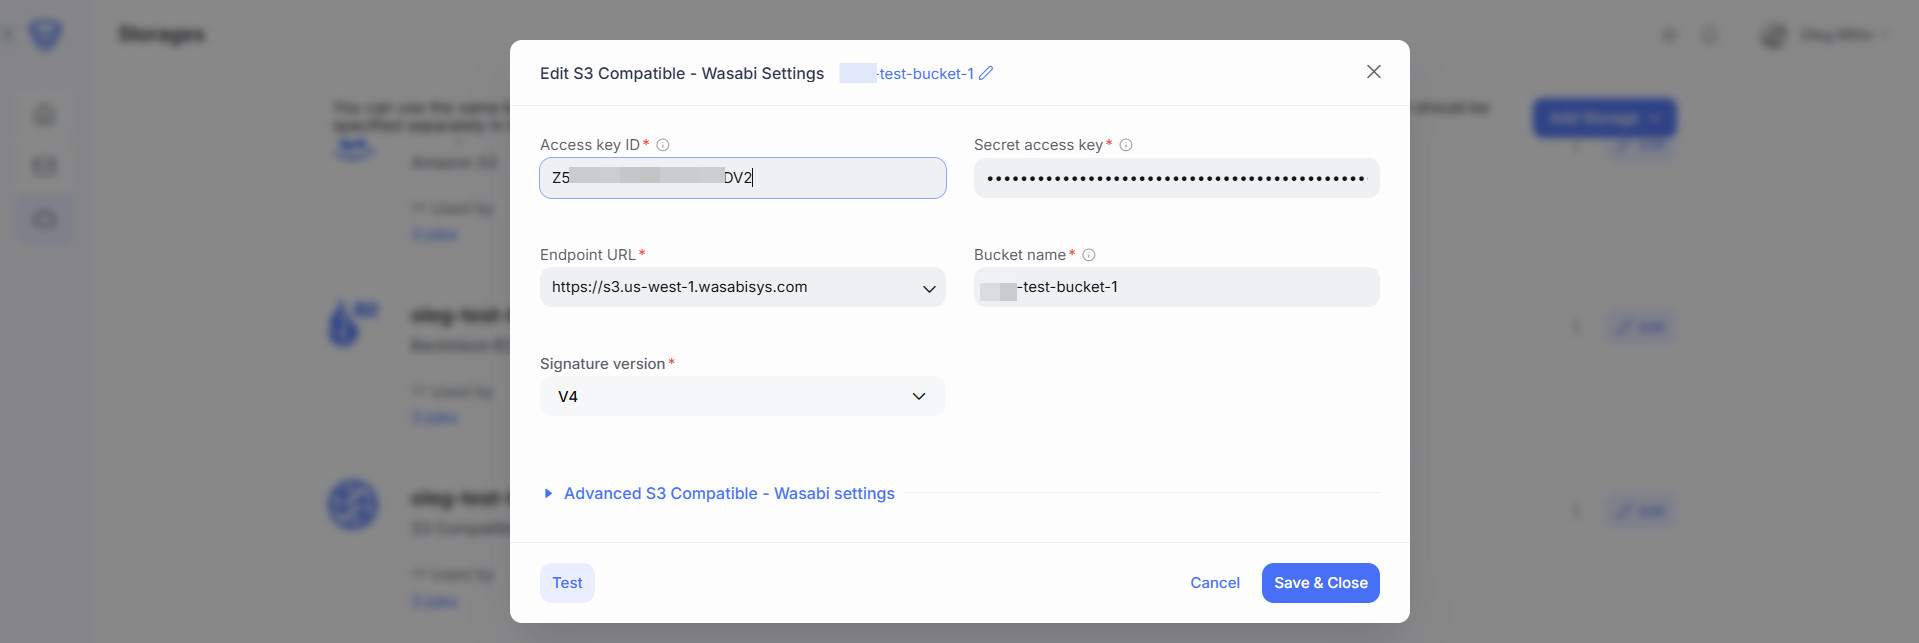
2. In the “New S3 Compartible Settings” pop-up window, , enter the following credentials:
- Access Key ID – Found in your S3 Compartible storage account.
- Secret Access Key – Found in your S3 Compartible storage account.
- Endpoin URL – The service endpoint provided by your S3-compatible storage provider (e.g.,
https://s3.wasabisys.comor custom endpoint). - Bucket Name – This is the S3 bucket where your backups will be stored. You need to create this bucket before configuring it in the app.
- Authentication Region – Specify the appropriate region for your storage (e.g.,
us-east-1).
Once configured, click “Test” to verify the connection. If successful, click “Save & Close” to apply your settings.
These are the basic settings required to configure Amazon S3 as a backup destination.
3. Once configured, click “Test” to verify the connection. If successful, click “Save & Close” to apply your settings.
These are the basic settings required to configure S3 Compartible storage as a backup destination.
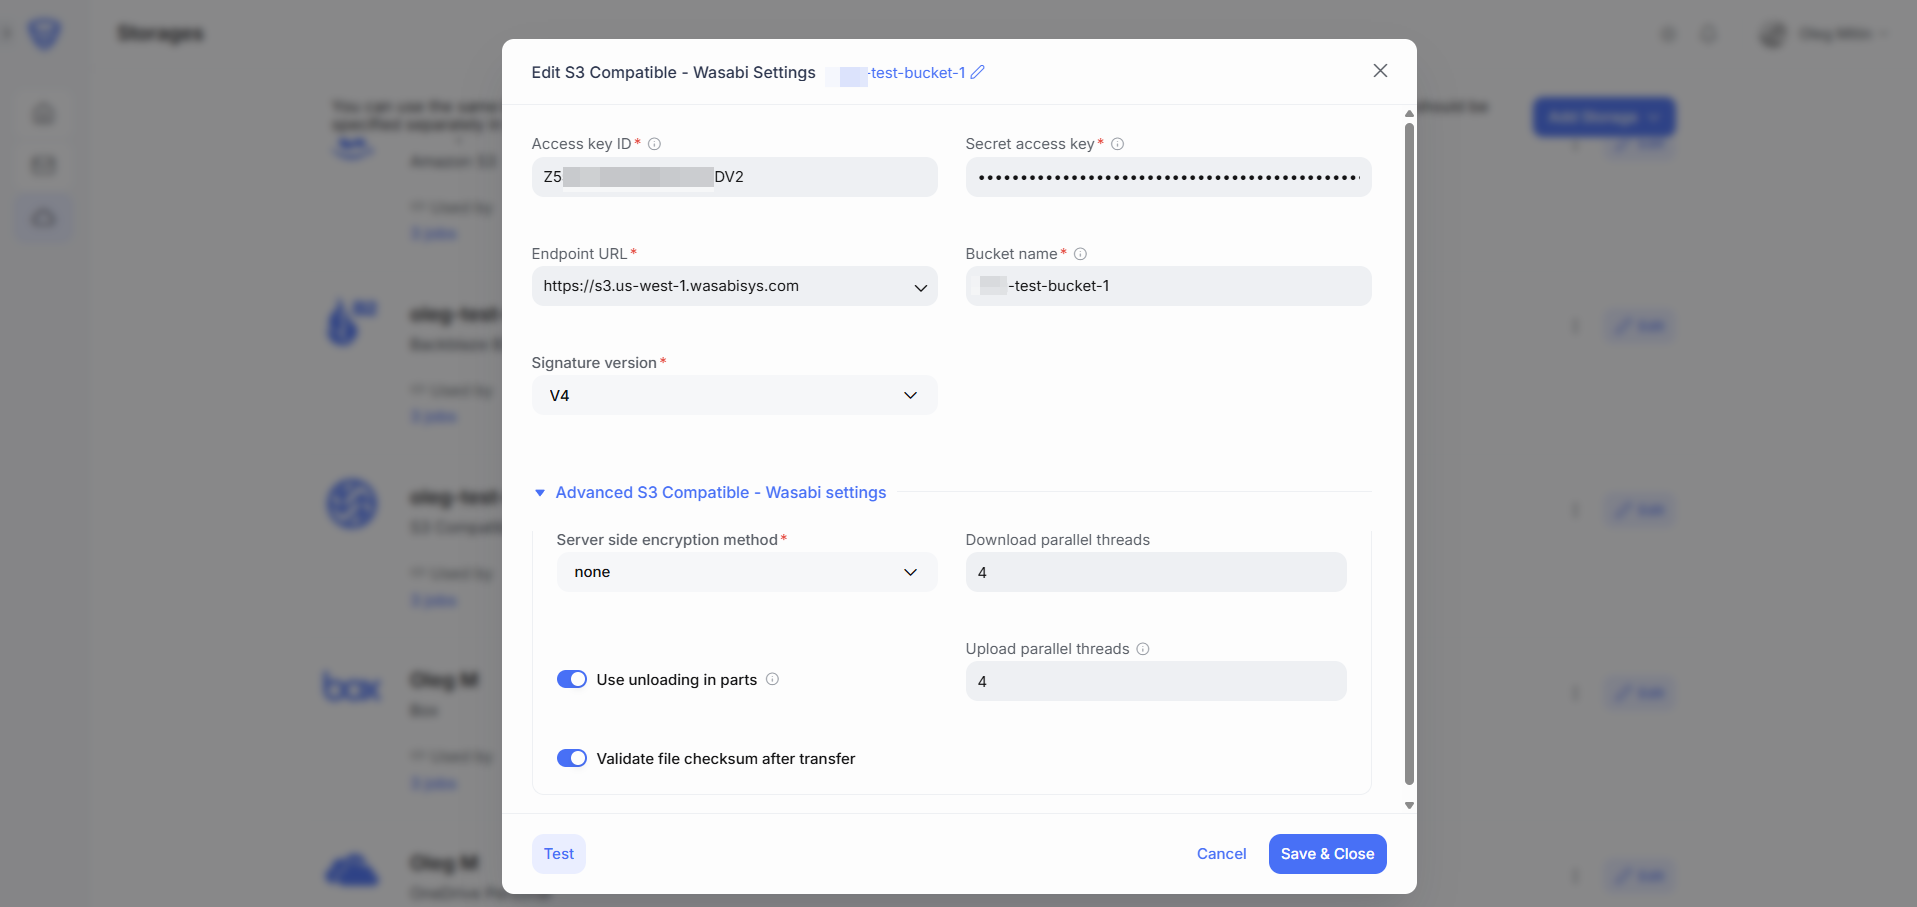
Advanced S3 Compartible Settings (Optional)
You can further customize your backup storage with the following options:
-
Server-Side Encryption method – Enable encryption to protect your backups during storage (e.g.,
AES256). -
Disable upload payload signing – Disable the SigV4 payload signing data integrity check on uploading request.
-
Parallel Upload/Download Threads – Adjust performance settings for faster transfers.
-
Validate File Checksum & Use Additional Checksum – Verifies file integrity after upload by checking checksums (e.g., MD5). Optional additional checksum validation can further enhance data reliability.
-
Use unloading in parts – Multipart Upload allows you to upload a single object as a set of parts.
- Use URL encoding – Applies URL encoding to object names, which may be required by some providers to ensure proper handling of special characters.
Steps to add OneDrive Personal storage to a backup job:
-
Return to the Dashboard page.
-
Open the backup job you want to modify (or create a new one), and click the “Edit” button.
-
Navigate to the Storage Destination section.
-
Click “Add Backup Storage”.
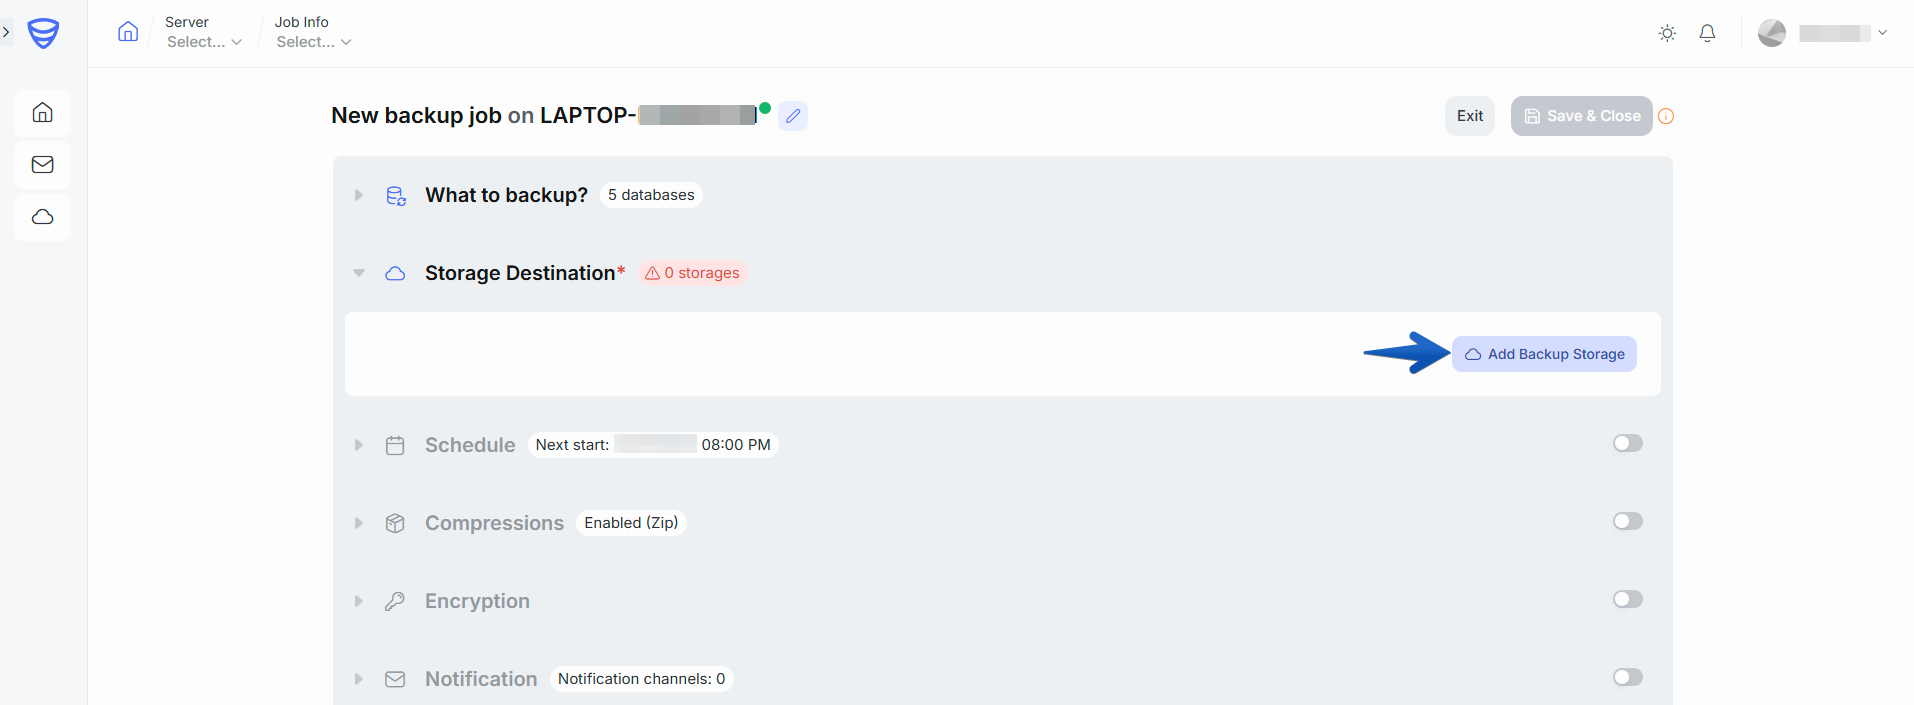
5. Select OneDrive for Business storage as the destination.

6. In the configuration window, specify the following:
-
-
Autodelete old backups after – Define a retention period for automatically deleting old backups.
-
Enable minimum backups – Set the minimum number of backups to retain, even if they exceed the defined retention period.
-
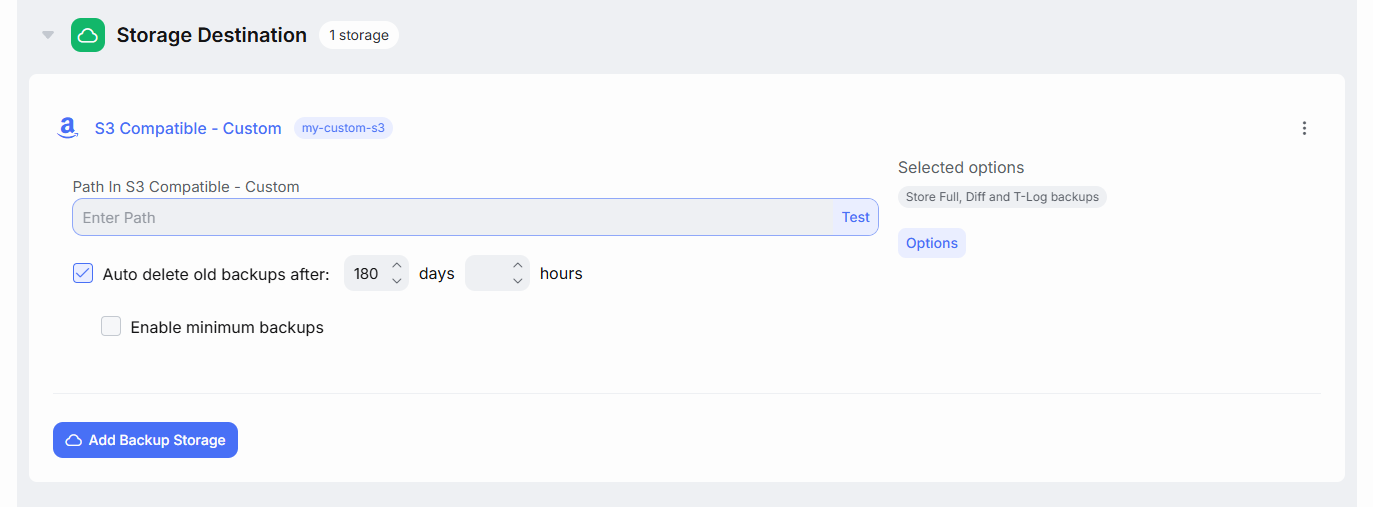
Optional settings:
-
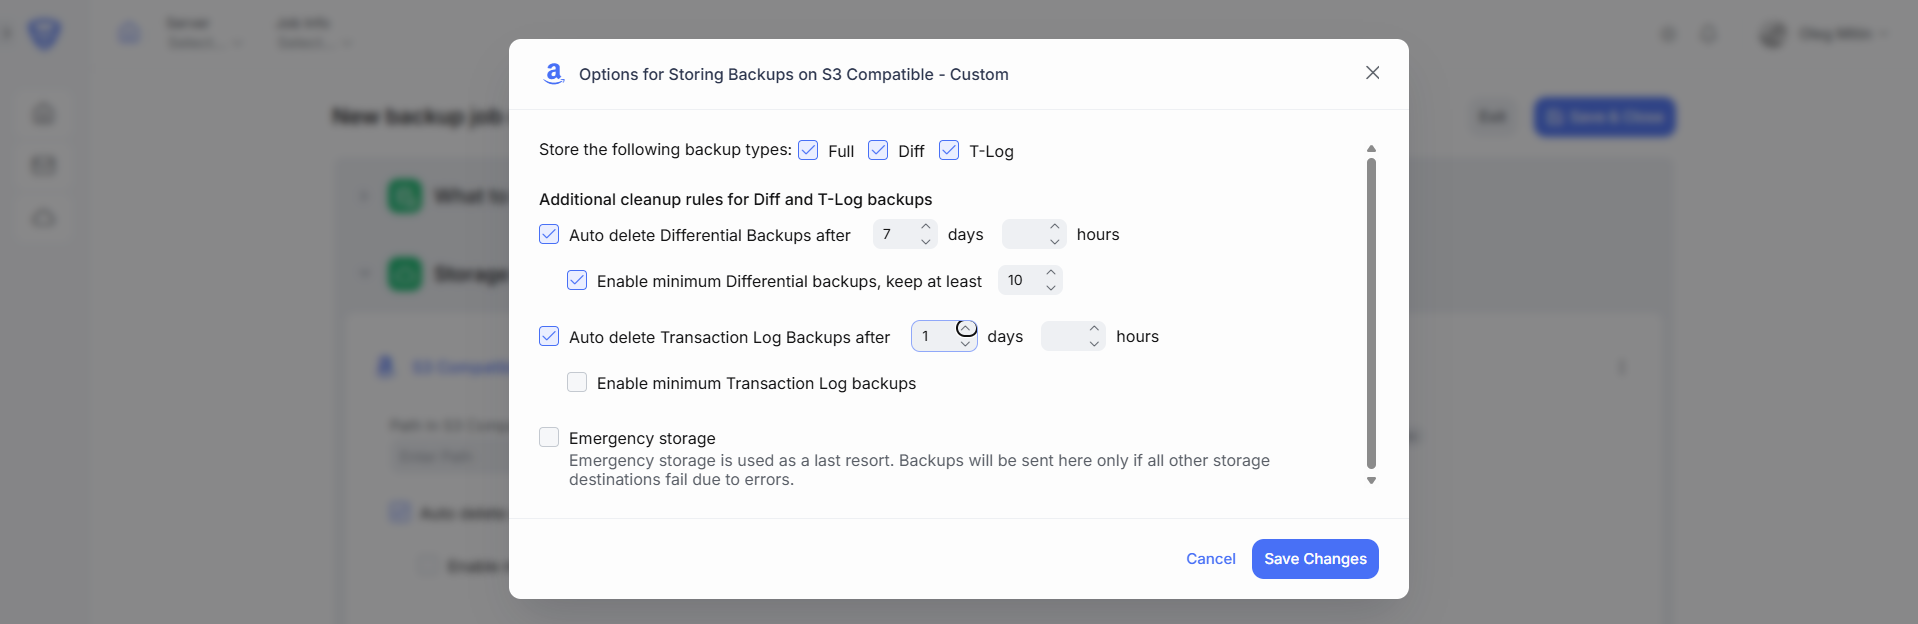
Store the following backup types (Full, Diff, T-Log) – Choose which backup types to store in this destination.
-
Auto delete Differential Backups after – Define a retention period specifically for differential backups.
-
Auto delete T-Log Backups after – Define a retention period specifically for transaction log backups.
-
Enable minimum Differential or T-Log backups – Set the minimum number of differential or T-Log backups to keep, even if older than the retention limit.
-
Emergency storage – Use this option to designate Azure Blob as an emergency/failover destination in case the primary backup storage becomes unavailable.