Backblaze B2
Adding Backblaze B2 storage as a backup destination
To send backups to Backblaze B2 storage, you first need to set up a destination in the “Storages” page:
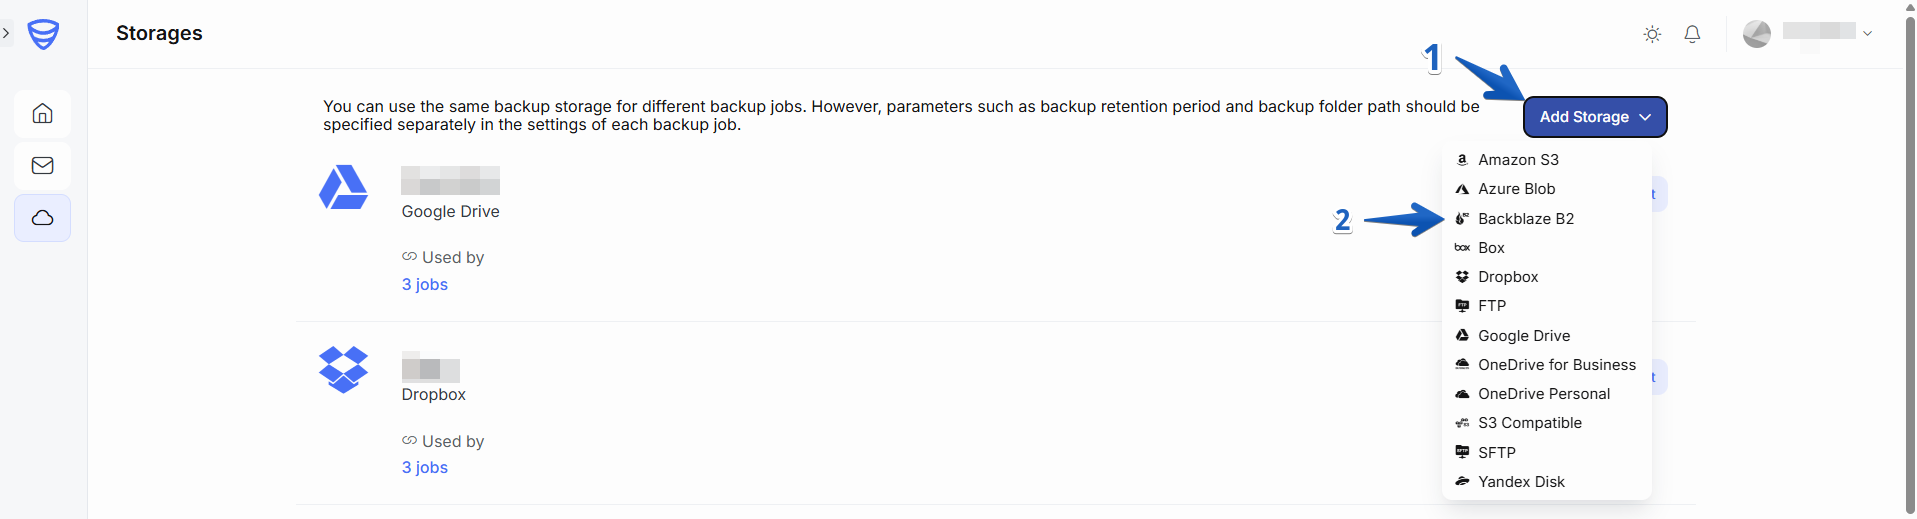
1. Go to the “Storages” page and click “Add Storage” and select Backblaze B2 as the storage destination:
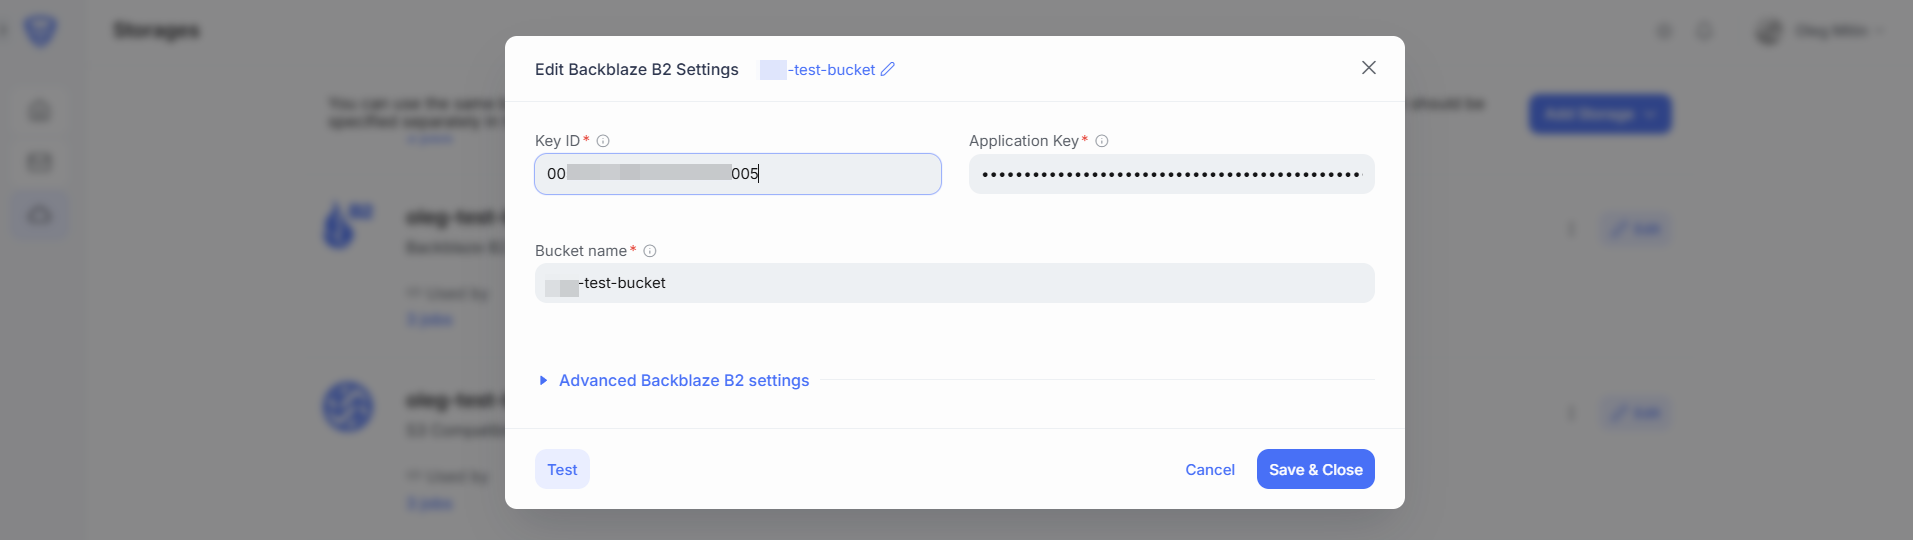
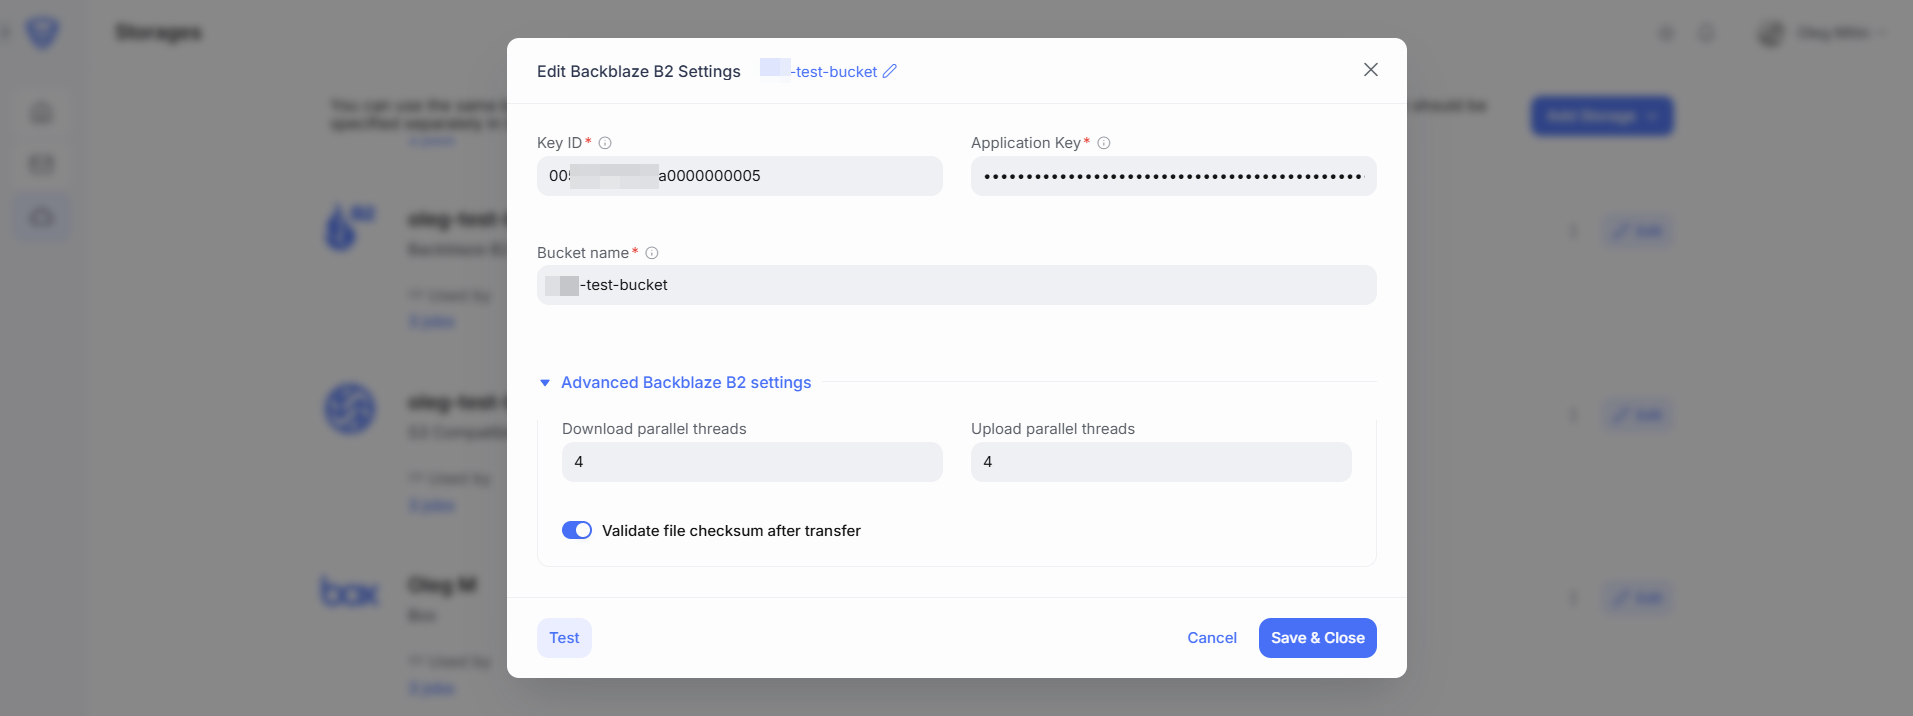
2. In the “New Backblaze B2 Settings” pop-up window, enter the following credentials:
-
-
Key ID – Find Key ID on your Backblaze Account.
-
Application Key – You can find Application key on your Backblaze Account.
-
Bucket Name – Bucket names must be unique across all of Backblaze B2. If bucket does not exist, a new one will be created.
-
Once configured, click “Test” to verify the connection. If successful, click “Save & Close” to apply your settings.
Where to get Key ID and Application Key?
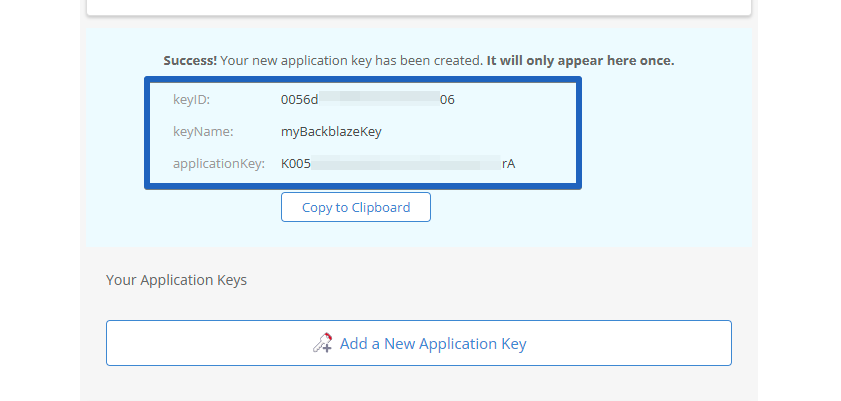
The Application Key to your Backblaze B2 storage cannot be retrieved from you Backblaze account once it has been created. If you did not store it when it was first generated, you will need to create a new Application Key.
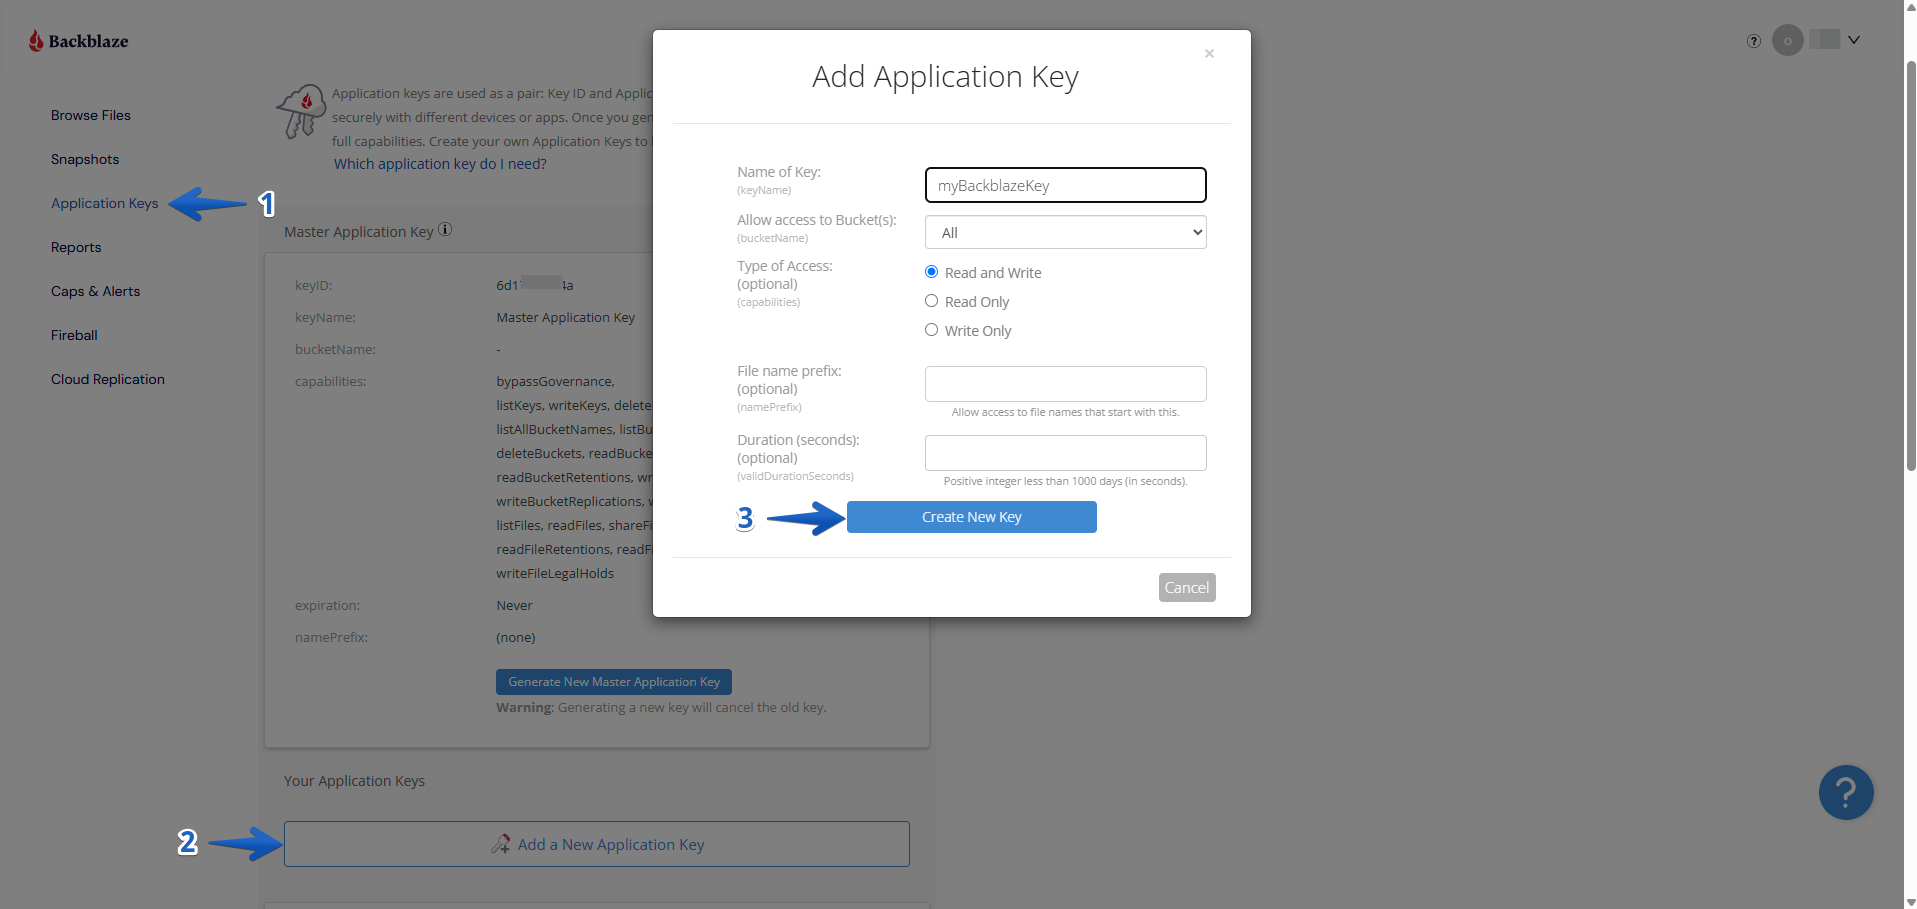
To create a new Key ID and Application Key (Access Key ID and Secret Application Key):
-
Log in to your Backblaze B2 account.
-
In the left-hand menu, navigate to Application Keys under the Buckets section.
-
Click the “Add a New Application Key” button and fill in the required information:
-
Click “Create New Key”.
⚠️ Important: After creation, make sure to copy and securely store the Key ID and Application Key, as the Application Key will not be shown again once you leave the page.
Advanced Backblaze B2 Settings (Optional)
You can further customize your backup storage with the following options:
-
Parallel Upload/Download Threads – Increase the number of threads to boost upload and download performance, especially for large files.
-
Validate file checksum after transfer – Verifies data integrity by checking the file checksum after transfer completion.
Once configured, click “Test” to verify the connection. If successful, click “Save & Close” to apply your settings.
Steps to add Backblaze B2 storage to a backup job:
-
Return to the Dashboard page.
-
Open the backup job you want to modify (or create a new one), and click the “Edit” button.
-
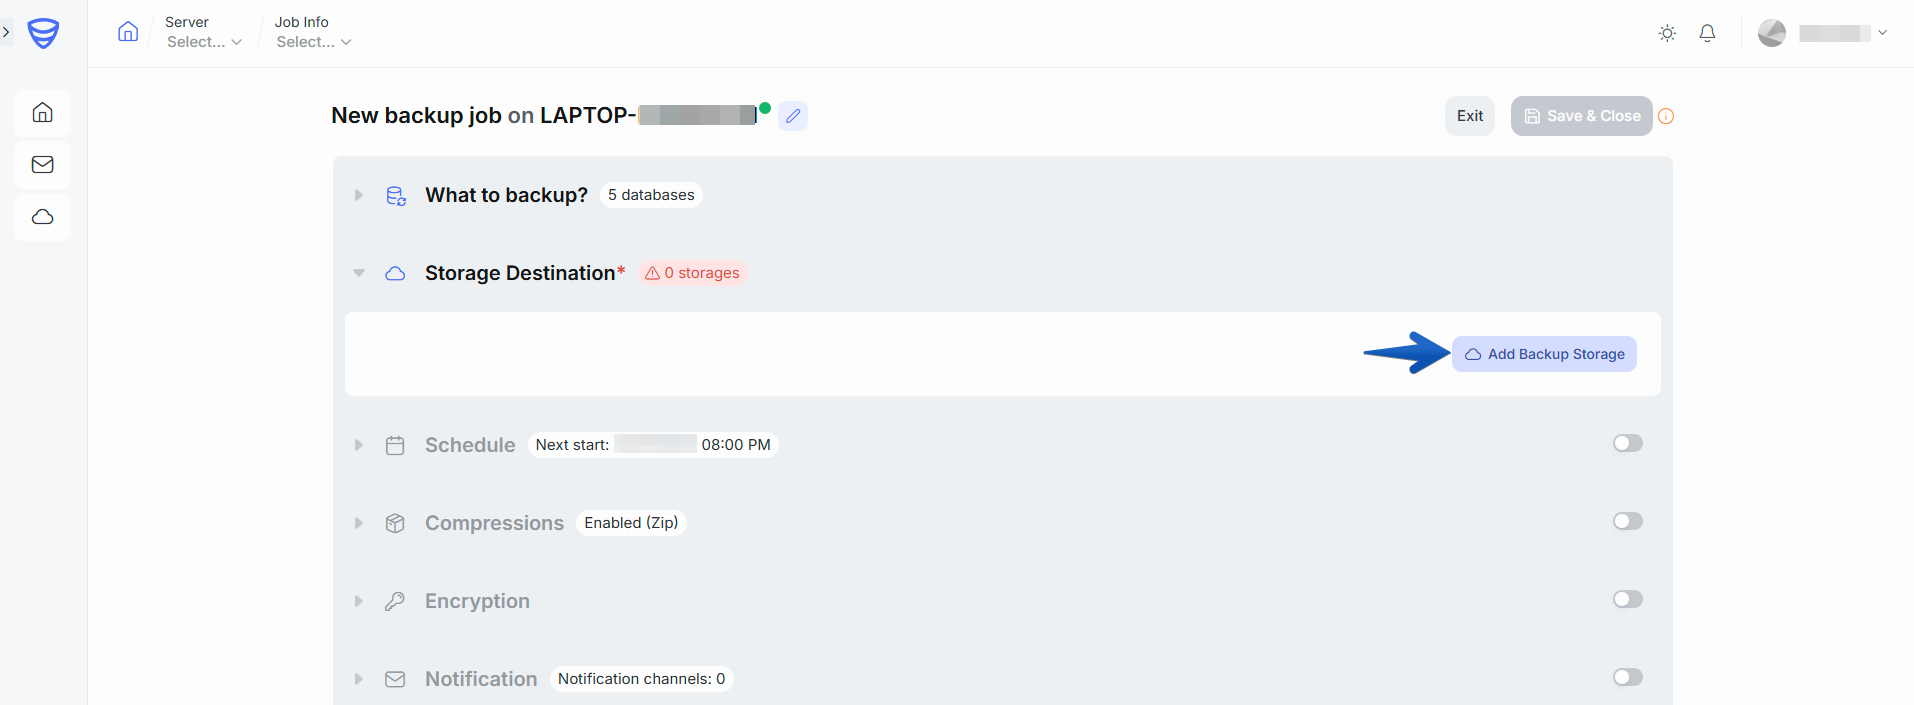
Navigate to the Storage Destination section.
-
Click “Add Backup Storage”.
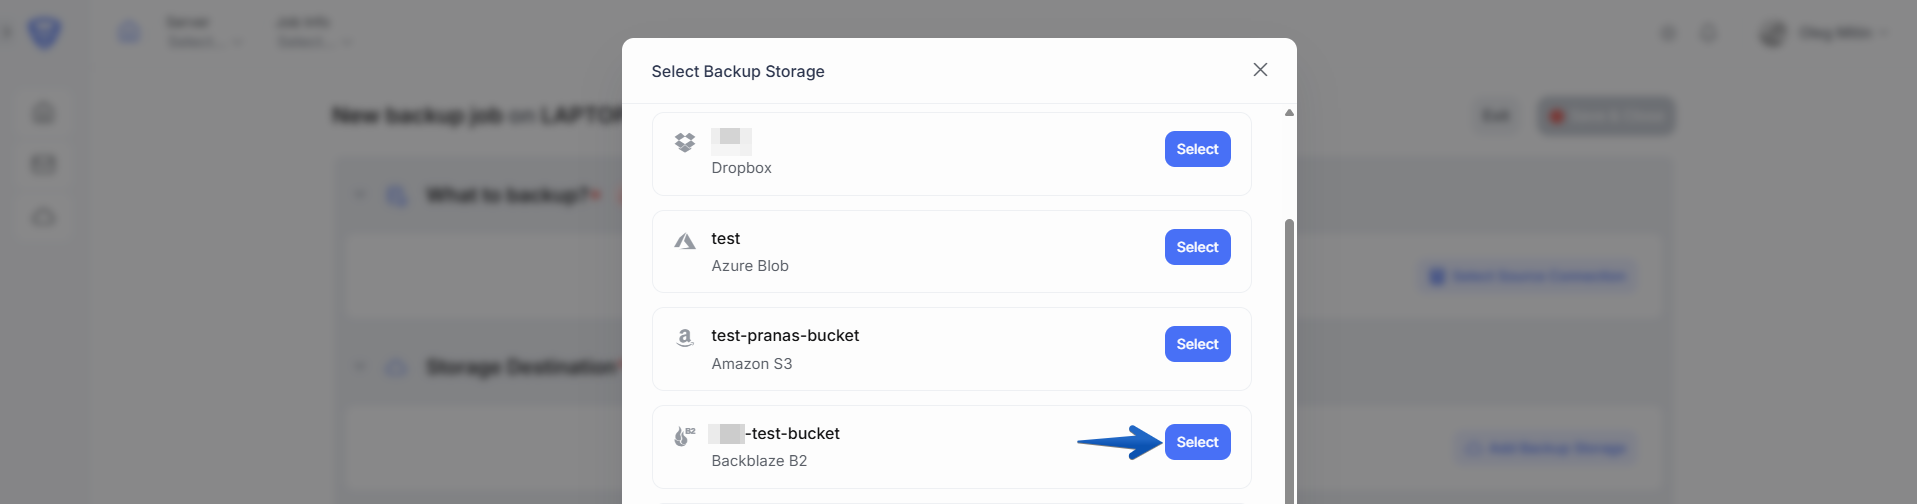
5. Select Backblaze B2 storage as the destination.
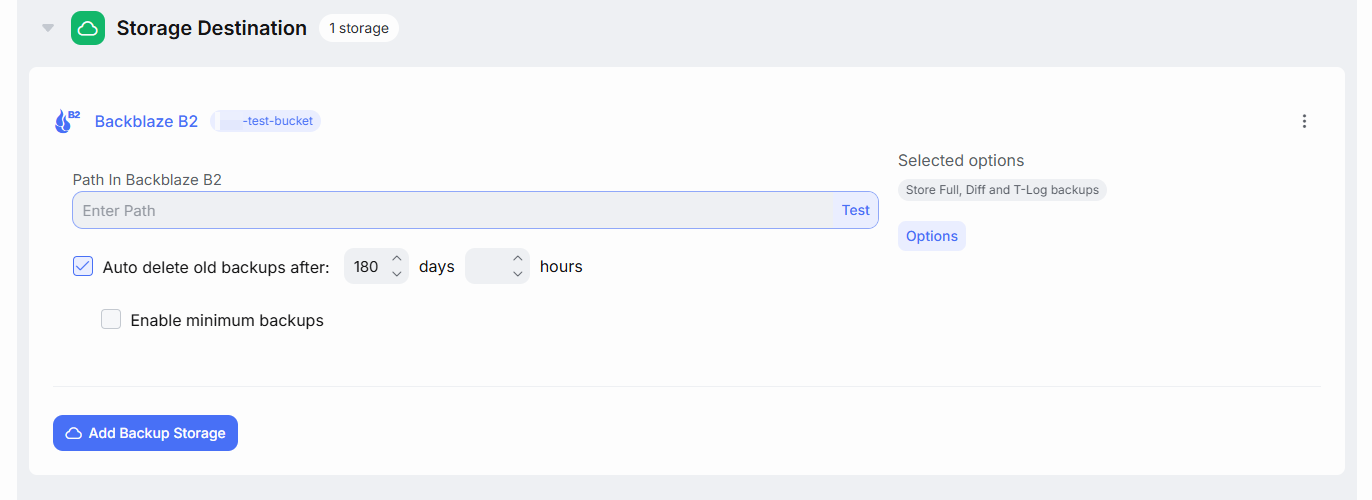
6. In the configuration window, specify the following:
-
-
Autodelete old backups after – Define a retention period for automatically deleting old backups.
-
Enable minimum backups – Set the minimum number of backups to retain, even if they exceed the defined retention period.
-
Optional settings:
-
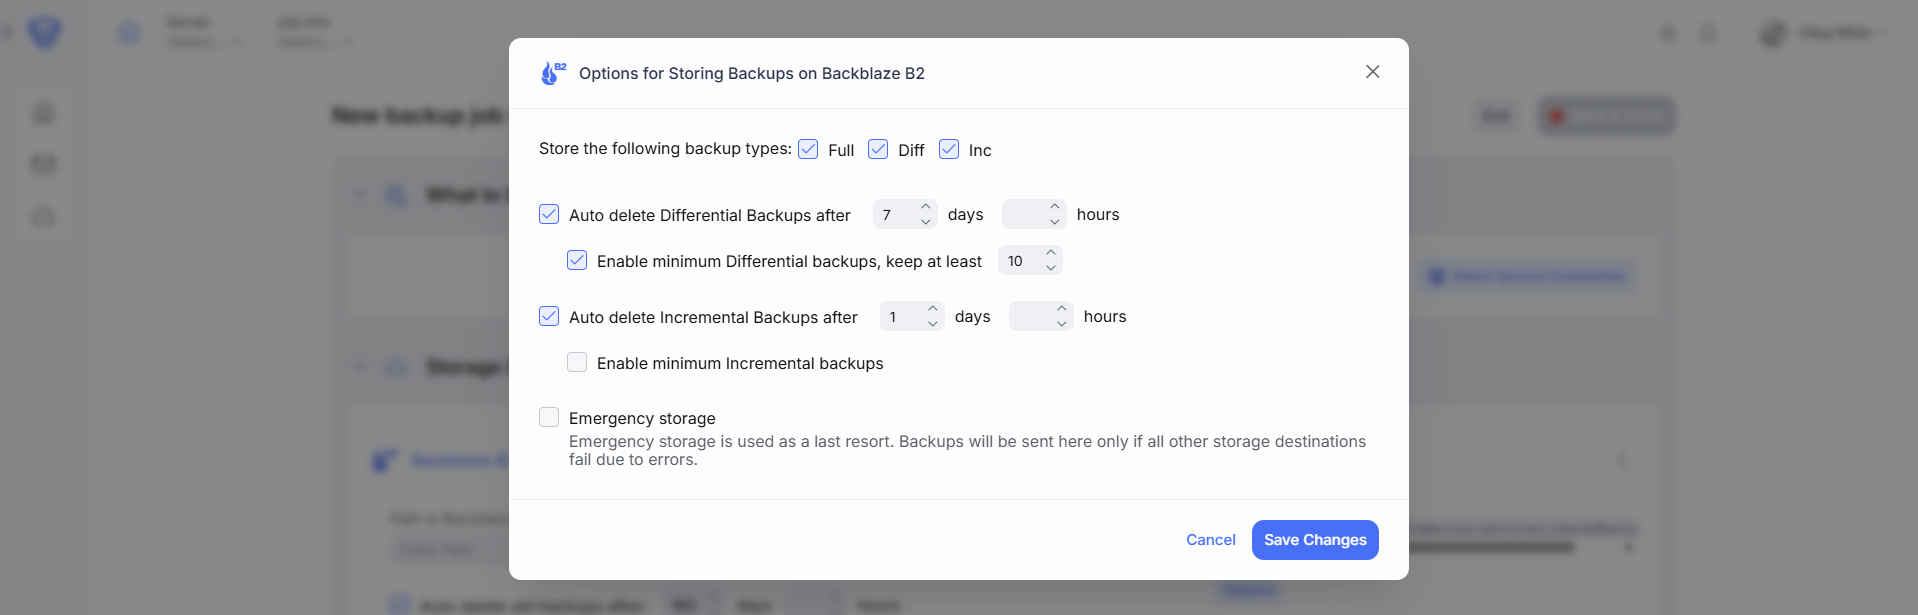
Store the following backup types (Full, Diff, T-Log) – Choose which backup types to store in this destination.
-
Auto delete Differential Backups after – Define a retention period specifically for differential backups.
-
Auto delete T-Log Backups after – Define a retention period specifically for transaction log backups.
-
Enable minimum Differential or T-Log backups – Set the minimum number of differential or T-Log backups to keep, even if older than the retention limit.
-
Emergency storage – Use this option to designate Backblaze B2 as an emergency/failover destination in case the primary backup storage becomes unavailable.